
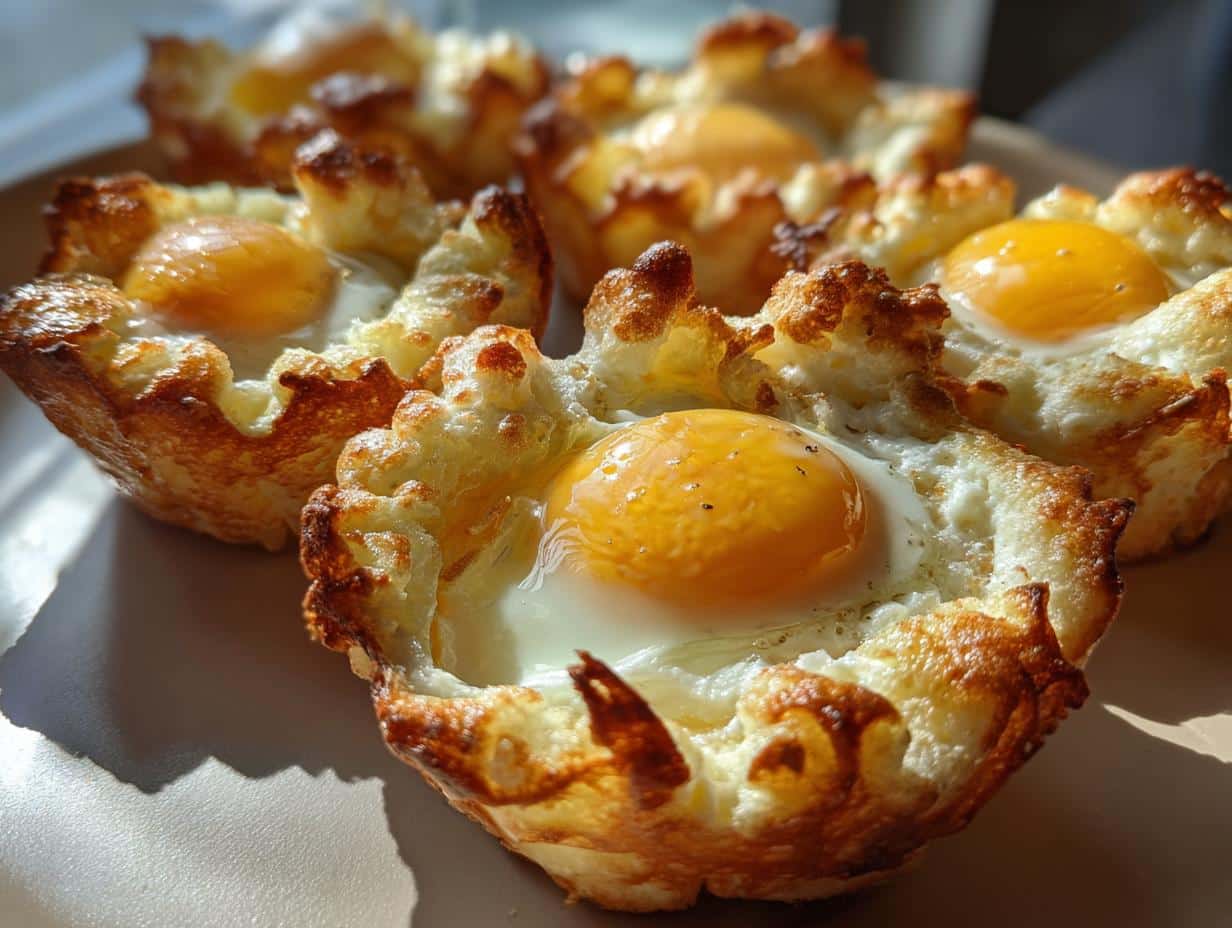
There’s something utterly delightful about Protein Cloud Eggs. Just imagine fluffy egg whites baked to golden perfection, with a rich yolk nestled right in the center. It’s like having a cloud on your breakfast plate, and trust me, your taste buds will thank you! I first discovered this recipe on a busy morning when I wanted something healthy yet satisfying. The lightness of the whipped egg whites combined with the creamy yolk is pure magic. Plus, they’re not just pretty; these Protein Cloud Eggs fit perfectly into my low-calorie breakfast routine. I love how they’re not only delicious but also packed with protein, making them a great start to the day. You’ll feel like you’re indulging, but without the guilt! So, let’s dive into this easy and impressive recipe that’s bound to become a breakfast favorite in your home, just like it is in mine.

Ingredients List
To whip up these delightful Protein Cloud Eggs, you’ll need just a few simple ingredients that come together beautifully. Here’s what you’ll want to gather:
- 4 large eggs: Fresh eggs are key to achieving that delightful fluffiness.
- 1/4 teaspoon salt: A pinch of salt enhances the flavor of the egg whites.
- 1/4 teaspoon pepper: Freshly ground pepper adds a subtle kick.
- 1/4 cup grated cheese (optional): For a bit of richness and flavor, feel free to sprinkle in your favorite cheese!
These ingredients are not only easy to find but also work wonders together, creating a breakfast that looks as good as it tastes!
How to Prepare Protein Cloud Eggs (Separated)
Now that we’ve gathered all our ingredients, it’s time to dive into the fun part: making those fluffy Protein Cloud Eggs! Follow these steps, and you’ll have a breakfast masterpiece in no time.
Preheat the Oven
First things first, you’ll want to preheat your oven to 450°F (230°C). Preheating is crucial because it ensures that your egg whites will puff up beautifully as they bake. Trust me, this makes all the difference in texture!
Separate the Eggs
Next up, let’s separate those eggs! Crack each egg open, letting the whites flow into a large bowl while carefully keeping the yolks intact in their shells. It’s super important to keep any yolk out of the whites, as even a tiny bit can prevent them from whipping up properly. If you’re nervous, use the shell halves to help you transfer the yolk back and forth until the whites are completely free.
Whip the Egg Whites
Now comes the exciting part! Grab your electric mixer and whip the egg whites until stiff peaks form. This means the whites should hold their shape when you lift the beaters out. To get those perfect peaks, make sure your bowl is completely clean and dry. If you want a bit of extra stability, adding a pinch of cream of tartar while whipping can help too!
Forming the Nests
Once your egg whites are whipped to perfection, it’s time to shape them! Using a spatula, gently scoop the whipped egg whites onto a baking sheet lined with parchment paper, forming little nests. You’ll want to make a small indentation in the center of each nest to hold that delicious yolk later. Make them as fluffy and tall as you can—this is where the cloud magic happens!
Baking Instructions
Pop those nests into your preheated oven and bake for about 3-4 minutes, just until they’re lightly golden. Keep an eye on them! You want them to puff up and turn a lovely shade of golden brown without overcooking. The aroma wafting from the oven will have you drooling!
Adding the Yolks
Carefully remove the nests from the oven, and here’s where the fun continues! Gently add a yolk into the center of each nest. Don’t worry if it wobbles a bit—it adds to the charm! Return the nests to the oven for an additional 3-5 minutes, depending on how set you like your yolks. I love them just slightly runny!
Serving Suggestions
Finally, serve your Protein Cloud Eggs immediately for the best texture and flavor. These little fluffy wonders are perfect on their own or paired with a sprinkle of fresh herbs or extra cheese on top. You won’t want to wait long before digging in!
Nutritional Information
Before diving into these delicious Protein Cloud Eggs, it’s good to know what’s in them! Keep in mind that nutritional values can vary based on the specific ingredients and brands you use, so consider this a rough estimate:
- Calories: 150
- Fat: 10g
- Saturated Fat: 3g
- Trans Fat: 0g
- Cholesterol: 370mg
- Sodium: 200mg
- Carbohydrates: 1g
- Fiber: 0g
- Protein: 12g
This low-calorie breakfast option is packed with protein, making it a great choice for fueling your day ahead. Enjoy knowing you’re treating your body well while savoring every delicious bite!
Why You’ll Love This Recipe
Protein Cloud Eggs are not just a breakfast; they’re an experience! Here’s why you’ll absolutely adore this recipe:
- Easy Preparation: With just a few simple steps, you’ll have a stunning dish ready in no time!
- Low-Calorie Delight: At only 150 calories per serving, you can enjoy a light meal that doesn’t skimp on flavor.
- Unique Presentation: These fluffy nests look impressive on your plate, making them perfect for brunch or a special occasion.
- High in Protein: With 12g of protein, they’ll keep you full and energized throughout your morning.
Trust me, once you try these, they’ll become a regular in your breakfast rotation!
Tips for Success
To take your Protein Cloud Eggs to the next level, here are some pro tips I’ve gathered along the way:
- Seasoning Variations: Don’t be afraid to experiment! Try adding garlic powder, smoked paprika, or fresh herbs like chives or parsley for a flavor boost.
- Cheese Choices: While I love a sprinkle of cheddar, feel free to swap in feta, goat cheese, or even a bit of parmesan for a different twist.
- Storage Tips: If you have leftovers (which is rare!), store them in an airtight container in the fridge. They’re best enjoyed fresh, but you can reheat them gently in the oven to retain that fluffy texture.
With these tips, you’ll be a Protein Cloud Eggs pro in no time!
FAQ Section
Can I use egg substitutes?
While I love the classic taste of real eggs in my Protein Cloud Eggs, you can certainly try egg substitutes! Some options include egg whites from a carton or even aquafaba (the liquid from canned chickpeas). Just keep in mind that the texture may vary slightly, and you might not achieve the same fluffy cloud effect. But hey, it’s all about experimenting and finding what works best for you!
How do I store leftovers?
If you happen to have any leftovers (which, let’s be honest, is rare with these delicious bites!), store them in an airtight container in the fridge. When you’re ready to enjoy them again, gently reheat in the oven to help retain that fluffy texture. Microwaving isn’t recommended, as it can make them rubbery. Just take your time with the oven, and they’ll taste almost as good as fresh!
Can I add other ingredients?
Absolutely! The beauty of Protein Cloud Eggs is how customizable they are. You can mix in different cheeses like feta, goat cheese, or even a sprinkle of parmesan for extra flavor. Fresh herbs, such as chives or parsley, can add a nice touch too. Feel free to get creative with your seasonings, and make these eggs your own!
Final Thoughts
I can’t wait for you to try these Protein Cloud Eggs! They’re not just a treat for the taste buds but also a feast for the eyes. Once you whip them up, please share your experiences in the comments! I’d love to hear about your delicious creations and any fun twists you added. Happy cooking!
For more delicious recipes, check out my Pinterest page!
Print
Protein Cloud Eggs (Separated): 7 Reasons You’ll Love Them
- Total Time: 20 minutes
- Yield: 2 servings 1x
- Diet: Low Calorie
Description
Protein Cloud Eggs are fluffy egg whites baked until golden brown with a rich yolk nestled in the center.
Ingredients
- 4 large eggs
- 1/4 teaspoon salt
- 1/4 teaspoon pepper
- 1/4 cup grated cheese (optional)
Instructions
- Preheat your oven to 450°F (230°C).
- Separate the egg whites from the yolks, placing the whites in a large bowl.
- Add salt and pepper to the egg whites.
- Whip the egg whites until stiff peaks form.
- Gently fold in cheese if using.
- Form the whipped egg whites into nests on a baking sheet lined with parchment paper.
- Make a small indentation in the center of each nest.
- Bake for 3-4 minutes until lightly golden.
- Remove from the oven and carefully add a yolk to each nest.
- Bake for an additional 3-5 minutes until the yolk is set to your liking.
Notes
- Serve immediately for best texture.
- Experiment with different seasonings.
- Prep Time: 10 minutes
- Cook Time: 10 minutes
- Category: Breakfast
- Method: Baking
- Cuisine: American
Nutrition
- Serving Size: 1 serving
- Calories: 150
- Sugar: 0g
- Sodium: 200mg
- Fat: 10g
- Saturated Fat: 3g
- Unsaturated Fat: 7g
- Trans Fat: 0g
- Carbohydrates: 1g
- Fiber: 0g
- Protein: 12g
- Cholesterol: 370mg