
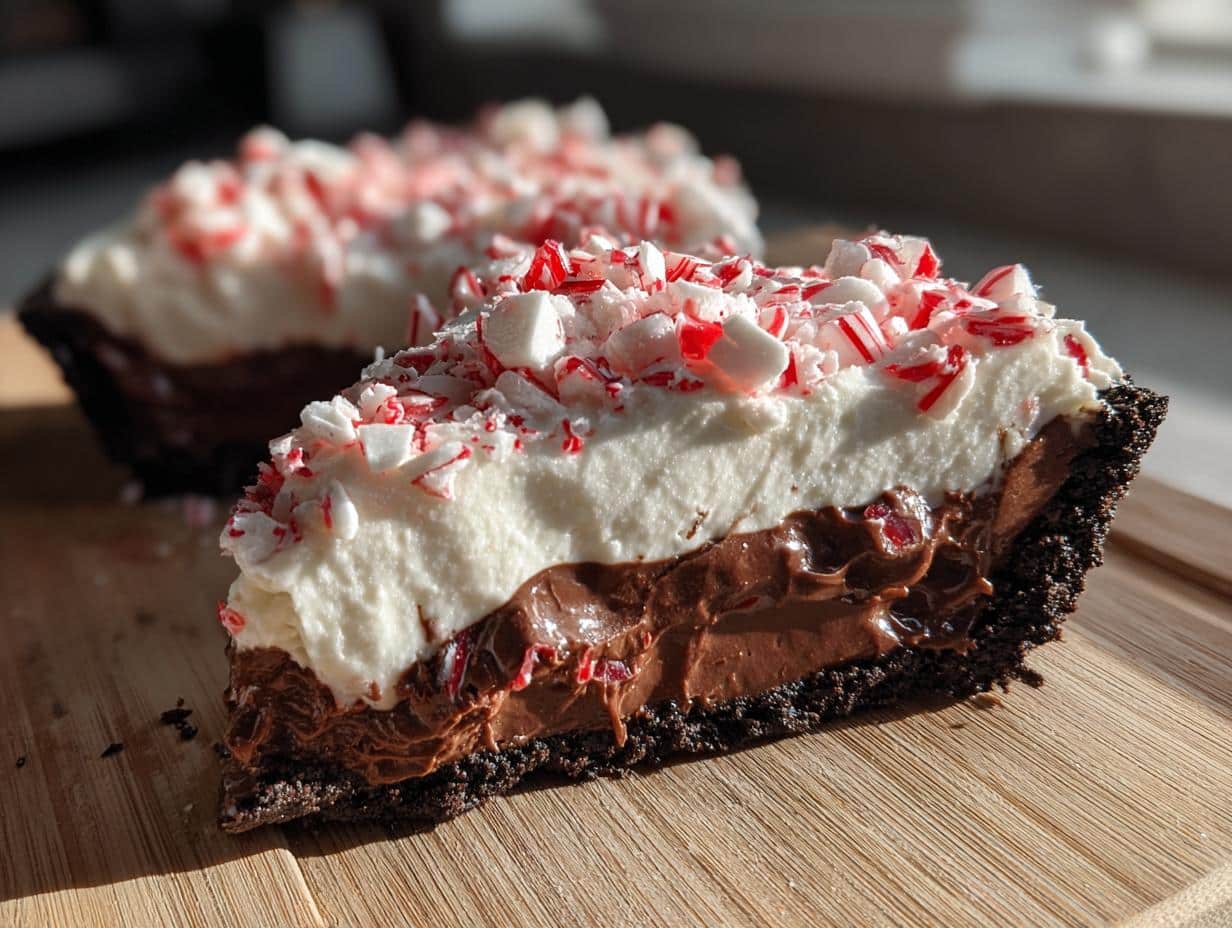
Oh boy, do I have a treat for you! Every holiday season, I find myself craving this rich and creamy chocolate peppermint pie that just dances on your taste buds. It’s the ultimate festive dessert that combines the deep, luscious flavor of chocolate with a refreshing hint of peppermint – the perfect balance for any holiday gathering! Trust me, once you make this pie, it’ll become a cherished tradition in your home just like it has in mine.
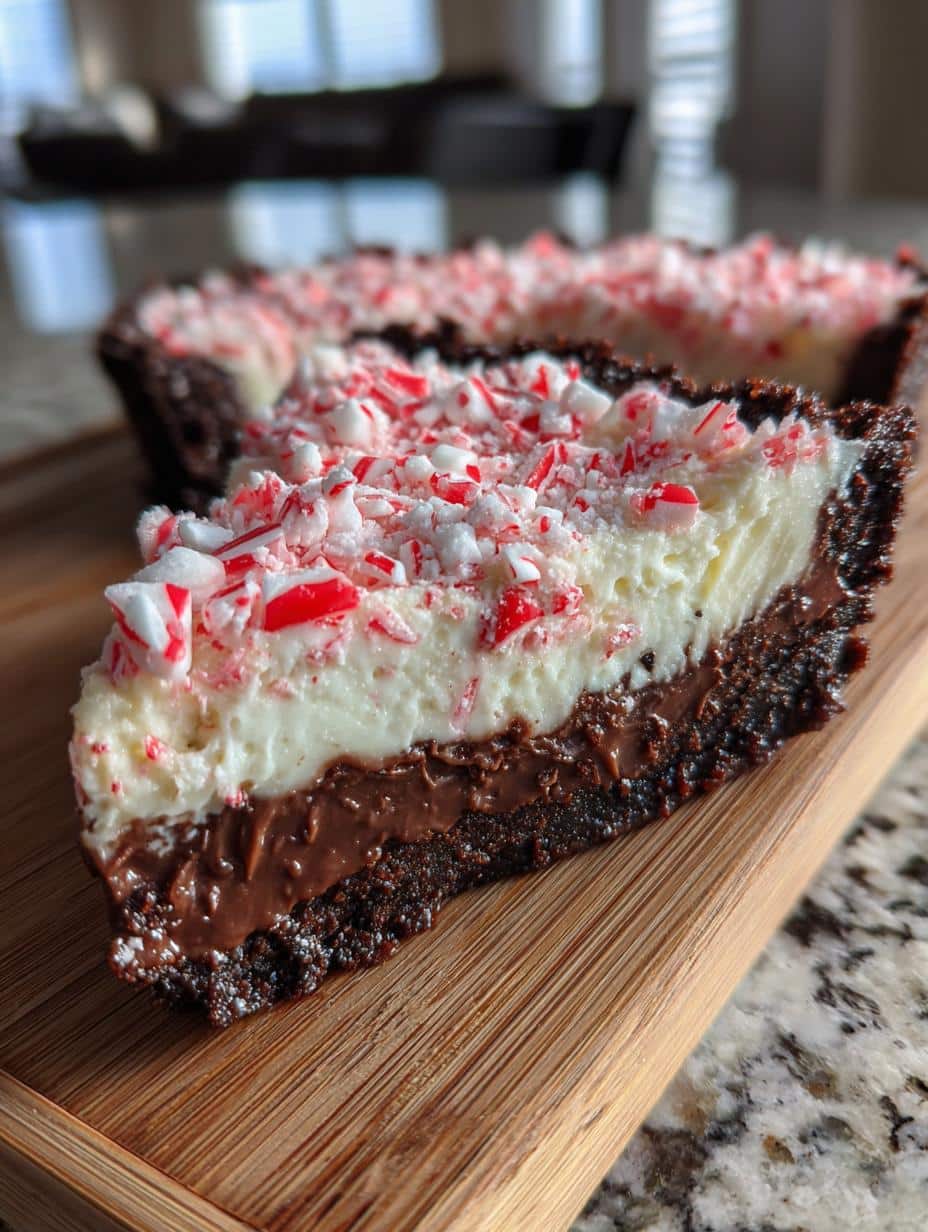
Picture this: a velvety filling sitting in a crunchy graham cracker crust, topped with a sprinkle of crushed peppermint candies that add a delightful crunch. It’s not only delicious but also surprisingly easy to whip up, meaning you can spend less time in the kitchen and more time enjoying the company of your loved ones. This chocolate peppermint pie is the kind of dessert that brings everyone together – it’s festive, fun, and oh-so-satisfying!
So grab your mixing bowl and let’s dive into making this showstopper dessert that will have everyone asking for seconds (and maybe even thirds!).
Ingredients List
Here’s what you’ll need to create this delightful chocolate peppermint pie:
- 1 pre-made graham cracker crust
- 8 oz cream cheese, softened to room temperature
- 1 cup powdered sugar
- 1 cup whipped cream (store-bought or homemade)
- 1 cup chocolate chips, semi-sweet or dark
- 1/2 teaspoon peppermint extract (adjust to taste for extra minty goodness)
- 1/2 cup crushed peppermint candies, for that festive crunch on top
Make sure your cream cheese is nice and soft – it makes blending so much easier! I always find that using high-quality chocolate really elevates the flavor, so go for your favorite brand. And don’t skimp on the peppermint candies; they add a magical touch that ties everything together perfectly!
How to Prepare Chocolate Peppermint Pie
Alright, let’s get this chocolate peppermint pie party started! Follow these simple steps, and I promise you’ll have a stunning dessert that’s sure to impress. Ready? Let’s go!
- Preheat your oven: First off, set that oven to 350°F (175°C). We want it nice and warm for the chocolate!
- Melt the chocolate: Grab your chocolate chips and either pop them in the microwave in 30-second intervals or use a double boiler on the stovetop. Stir until they’re completely melted and smooth. Be careful not to overheat; burnt chocolate is a no-go!
- Beat the cream cheese: In a mixing bowl, beat the softened cream cheese until it’s silky smooth. You want it to be lump-free and fluffy – this step is crucial for that creamy texture!
- Add powdered sugar: Gradually mix in the powdered sugar until it’s well combined. This is where the sweetness starts to build up, so mix until it’s a lovely creamy consistency.
- Incorporate whipped cream: Gently fold in the whipped cream and peppermint extract. Be careful not to deflate the whipped cream; you want that light, airy texture in your pie!
- Mix in the melted chocolate: Now, pour in that gorgeous melted chocolate and fold it all together. You want everything combined without losing that fluffiness we just achieved.
- Fill the crust: Pour your luscious chocolate peppermint filling into the pre-made graham cracker crust. Smooth the top with a spatula, and don’t worry if it looks a little messy – it’s going to be delicious regardless!
- Chill: Here comes the hardest part: patience! Cover the pie with plastic wrap and pop it in the refrigerator for at least 4 hours. This allows it to set up perfectly – you want it to be nice and firm when you slice into it!
- Top with peppermint candies: Just before serving, sprinkle those crushed peppermint candies over the top for that festive flair and extra crunch. Wow, it’s starting to look amazing!
And there you have it! A deliciously creamy chocolate peppermint pie that’s ready to be devoured. Just remember to keep it chilled until you’re ready to serve, and watch the smiles appear as everyone takes their first bite!
FAQ Section
Got questions about this delicious chocolate peppermint pie? Don’t worry, I’ve got you covered! Here are some common queries I get and my answers to help you out:
Q1. Can I make this chocolate peppermint pie ahead of time?
Absolutely! In fact, I recommend it! This pie tastes even better after chilling overnight. Just make sure to cover it well with plastic wrap to keep it fresh in the fridge. It’s a perfect make-ahead dessert for holiday gatherings!
Q2. What can I use instead of graham cracker crust?
If you’re looking to switch it up, you can use an Oreo crust for a richer flavor or a shortbread crust for a buttery twist. Both options provide a delightful contrast to the creamy filling while still being super easy to make!
Q3. How can I adjust the peppermint flavor in the pie?
Totally up to your taste buds! If you’re a peppermint fan, feel free to add a bit more peppermint extract to the filling. Just keep in mind that a little goes a long way, so add it gradually and taste as you go!
Q4. Can I use dairy-free ingredients for this recipe?
You can! Simply swap out the cream cheese for a dairy-free cream cheese alternative, and use a dairy-free whipped cream. This way, you’ll still enjoy all that creamy goodness without the dairy!
Q5. How long does this chocolate peppermint pie last in the fridge?
This pie can last about 3-4 days in the fridge if stored properly. Just make sure to keep it covered to maintain its freshness. However, I doubt it will last that long with how delicious it is – so good luck resisting!
Why You’ll Love This Recipe
- Quick and Easy to Prepare: With just a handful of ingredients, this chocolate peppermint pie can be whipped up in about 20 minutes, giving you more time to enjoy the festivities!
- Decadent Flavor: The rich chocolate paired with the refreshing peppermint makes for a flavor explosion that’s both comforting and festive. It’s a combination that’s hard to resist!
- Perfect for Any Occasion: Whether it’s a holiday gathering, a cozy family dinner, or just a treat for yourself, this pie fits right in and impresses everyone at the table.
- Make-Ahead Friendly: You can prepare this pie in advance and let it chill, making it a stress-free dessert option when hosting guests.
- Visually Stunning: With its creamy filling and colorful crushed peppermint topping, this pie doesn’t just taste great; it looks gorgeous on any dessert table!
Tips for Success
Ready to make your chocolate peppermint pie a true showstopper? Here are some handy tips to ensure everything goes smoothly and turns out perfectly!
Use Room Temperature Ingredients
One of the biggest secrets to a creamy filling is making sure your cream cheese is at room temperature. Cold cream cheese can create lumps that just won’t blend nicely. So, take it out of the fridge about 30 minutes before you start. Trust me, it makes a world of difference!
Don’t Overheat the Chocolate
When melting your chocolate chips, keep an eye on them! Heat in short bursts and stir in between. Overheated chocolate can seize up and become grainy, which is a total bummer for your pie. A little patience here pays off with a smooth, silky filling!
Gently Fold the Whipped Cream
This step might sound simple, but it’s crucial! When you fold in the whipped cream, be gentle. You want to maintain that light and airy texture, so use a spatula and a folding motion rather than stirring vigorously. It’s all about keeping that fluffiness intact!
Chill, Chill, Chill!
Patience is key with this pie! Make sure to chill it for at least 4 hours, but I often let it sit overnight. This extra time helps the flavors meld together beautifully. Plus, it makes slicing easier, giving you those perfect, clean pieces!
Personalize Your Peppermint Topping
Feel free to get creative with your crushed peppermint candies! If you want a finer sprinkle, you can crush them into smaller pieces, or if you want a bolder crunch, leave them a bit bigger. Either way, it adds that festive flair and a delightful texture contrast!
Follow these tips, and you’ll absolutely nail your chocolate peppermint pie! It’s all about enjoying the process and making it your own. Happy baking!
Variations on Chocolate Peppermint Pie
Feeling adventurous? There are so many fun ways to switch up this chocolate peppermint pie to suit your tastes or to simply keep things exciting! Here are some variations that are just as delicious:
Different Crust Options
If you’re looking to change up the texture, try using different types of crusts! Here are a few ideas:
- Oreo Crust: Swap out the graham cracker crust for an Oreo crust for a chocolatey twist that pairs perfectly with the chocolate filling. Just crush those Oreos, mix with a bit of melted butter, and press it into your pie dish!
- Shortbread Crust: For a buttery flavor, use a shortbread crust. It adds a nice richness that complements the creamy filling beautifully.
- Nut-Based Crust: If you’re looking for a gluten-free option, a nut-based crust made from ground almonds or pecans mixed with a bit of butter is fantastic! It adds a lovely crunch and nutty flavor.
Flavor Variations
Want to mix things up flavor-wise? Here are some fun twists you can try:
- Chocolate Mint Swirl: Instead of fully mixing the melted chocolate into the filling, gently swirl it in for a marbled effect. It looks gorgeous and adds an extra chocolatey surprise in every bite!
- White Chocolate Peppermint: For a sweeter take, use white chocolate instead of dark or semi-sweet chocolate. The combination of white chocolate and peppermint is dreamy and perfect for those who prefer a milder chocolate flavor.
- Mocha Mint: If you’re a coffee lover, consider adding a tablespoon of instant coffee or espresso powder to the filling for a mocha twist. It pairs wonderfully with chocolate and gives it a nice depth!
Garnish Alternatives
Don’t forget about the toppings! Here are some alternative garnishes to consider:
- Chocolate Shavings: Instead of crushed peppermint, sprinkle some chocolate shavings on top for a more elegant finish.
- Whipped Cream Clouds: Add a dollop of freshly whipped cream on each slice for extra creaminess. You can even flavor the whipped cream with a touch of peppermint extract for a cohesive taste!
- Candy Cane Crumble: For a bolder peppermint flavor, crush candy canes instead of regular peppermint candies. It adds a festive flair and a delightful crunch!
With these variations, you can make this chocolate peppermint pie your own! Each twist brings something new to the table while keeping that beloved chocolate-peppermint goodness intact. So get creative and have fun experimenting!
Storage & Reheating Instructions
So, you’ve whipped up this delightful chocolate peppermint pie, and now you’re wondering how to store any leftovers (if there are any!). Don’t worry; I’ve got you covered!
First off, the best way to store your pie is in the refrigerator. Make sure to cover it tightly with plastic wrap or aluminum foil, or you can pop it into an airtight container. This keeps it fresh and helps maintain that creamy texture for about 3-4 days. Just know that the peppermint flavor tends to deepen over time, so it might even taste better the next day!
If you want to enjoy your pie later on or you’ve got a busy schedule, you can also freeze it. Just ensure that it’s wrapped well to prevent freezer burn. To freeze, slice the pie into individual pieces, place parchment paper between the slices, and then wrap the whole thing in plastic wrap followed by aluminum foil. It should keep well for about 1-2 months in the freezer.
When you’re ready to enjoy your frozen chocolate peppermint pie, simply thaw it in the refrigerator overnight. If you’re in a hurry, you can let it sit at room temperature for about 30 minutes before serving. No need to reheat this pie – it’s best enjoyed chilled!
So, whether you’ve got leftovers or just want to prepare ahead of time, follow these storage tips, and you’ll always have a slice of holiday magic ready to go!
Nutritional Information Disclaimer
Please note that the nutritional information provided for this chocolate peppermint pie is an estimate and can vary based on the specific ingredients and brands you use. Factors such as different types of crusts, cream cheese, and whipped cream can all impact the final nutritional values. For the most accurate information, always check the labels of your ingredients and adjust accordingly. Enjoy your pie with a sprinkle of joy, and remember, it’s all about balance!
For more delicious recipes, check out my Facebook page or follow me on Pinterest!
Print
Chocolate Peppermint Pie: 7 Reasons You’ll Adore This Dessert
- Total Time: 4 hours 30 minutes
- Yield: 8 servings 1x
- Diet: Vegetarian
Description
A rich and creamy chocolate peppermint pie perfect for the holidays.
Ingredients
- 1 pre-made graham cracker crust
- 8 oz cream cheese, softened
- 1 cup powdered sugar
- 1 cup whipped cream
- 1 cup chocolate chips
- 1/2 teaspoon peppermint extract
- 1/2 cup crushed peppermint candies
Instructions
- Preheat your oven to 350°F.
- Melt the chocolate chips in a microwave or double boiler.
- In a bowl, beat the cream cheese until smooth.
- Add powdered sugar and mix well.
- Fold in the whipped cream and peppermint extract.
- Add the melted chocolate and mix until combined.
- Pour the mixture into the graham cracker crust.
- Chill in the refrigerator for at least 4 hours.
- Before serving, top with crushed peppermint candies.
Notes
- Use dairy-free cream cheese for a vegan option.
- Adjust peppermint extract to taste.
- Store leftovers in the refrigerator.
- Prep Time: 20 minutes
- Cook Time: 10 minutes
- Category: Dessert
- Method: Chilling and baking
- Cuisine: American
Nutrition
- Serving Size: 1 slice
- Calories: 300
- Sugar: 20g
- Sodium: 150mg
- Fat: 15g
- Saturated Fat: 8g
- Unsaturated Fat: 5g
- Trans Fat: 0g
- Carbohydrates: 40g
- Fiber: 1g
- Protein: 3g
- Cholesterol: 30mg