
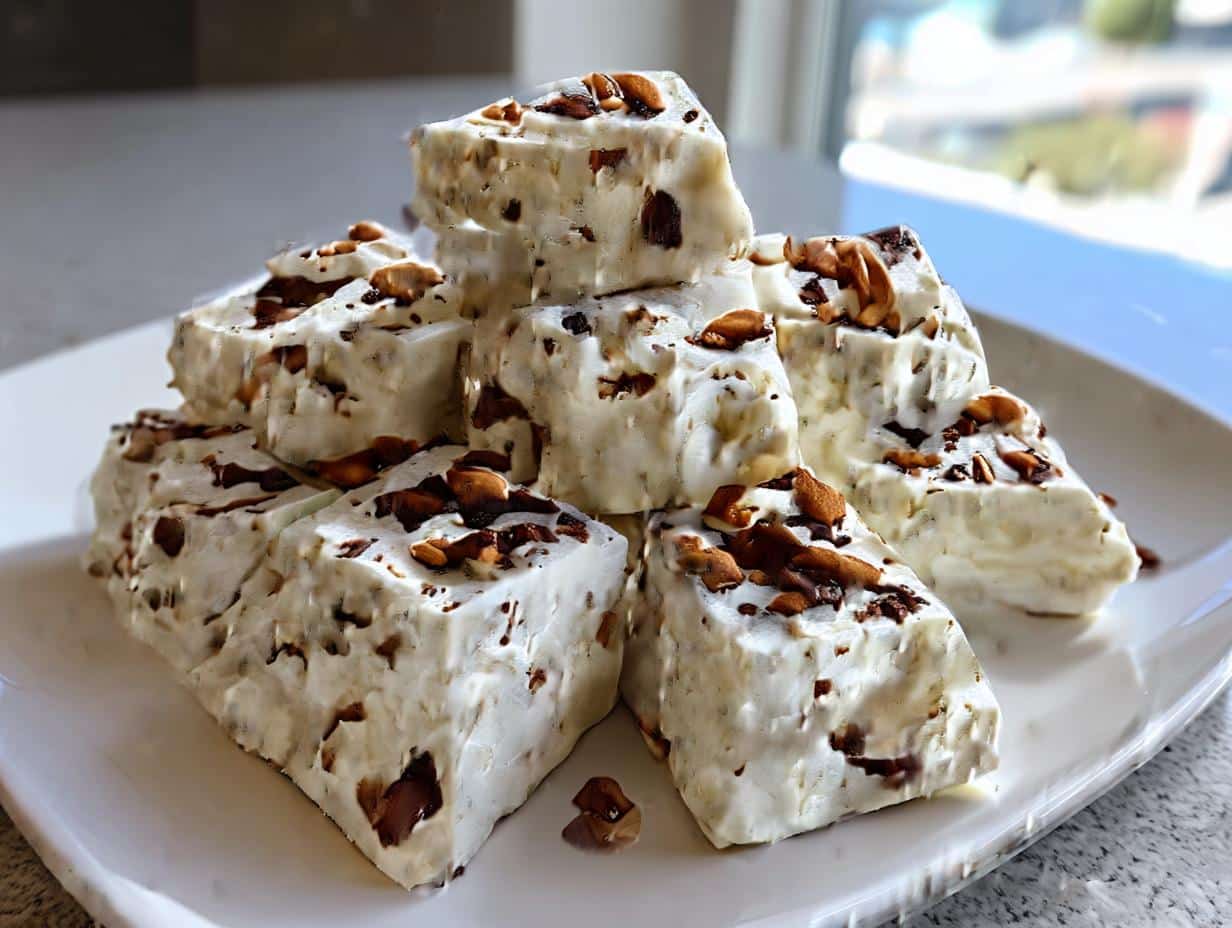
Oh my goodness, let me tell you about the magic of making holiday divinity candy! This sweet, fluffy treat is like a little bite of holiday cheer that dances on your tongue. I remember the first time I tried making it; the kitchen smelled like a festive wonderland, and my family couldn’t get enough of these sugary delights. Seriously, they’d disappear faster than I could cut them into squares!
Holiday divinity candy holds a special place in my heart, not just because of its melt-in-your-mouth texture, but also for the memories it brings back. Every holiday season, I’d gather around the kitchen with my mom and grandma, their laughter filling the air as we mixed, boiled, and whipped up this gorgeous candy. There’s just something so satisfying about watching the mixture transform into fluffy clouds of sweetness!
Now, I’ve made this candy countless times, and each batch comes with a sprinkle of nostalgia and joy. Trust me, once you get the hang of it, you’ll find it’s a delightful treat that’s perfect for sharing with family and friends during the holidays. So, grab your apron, and let’s dive into the world of holiday divinity candy together!
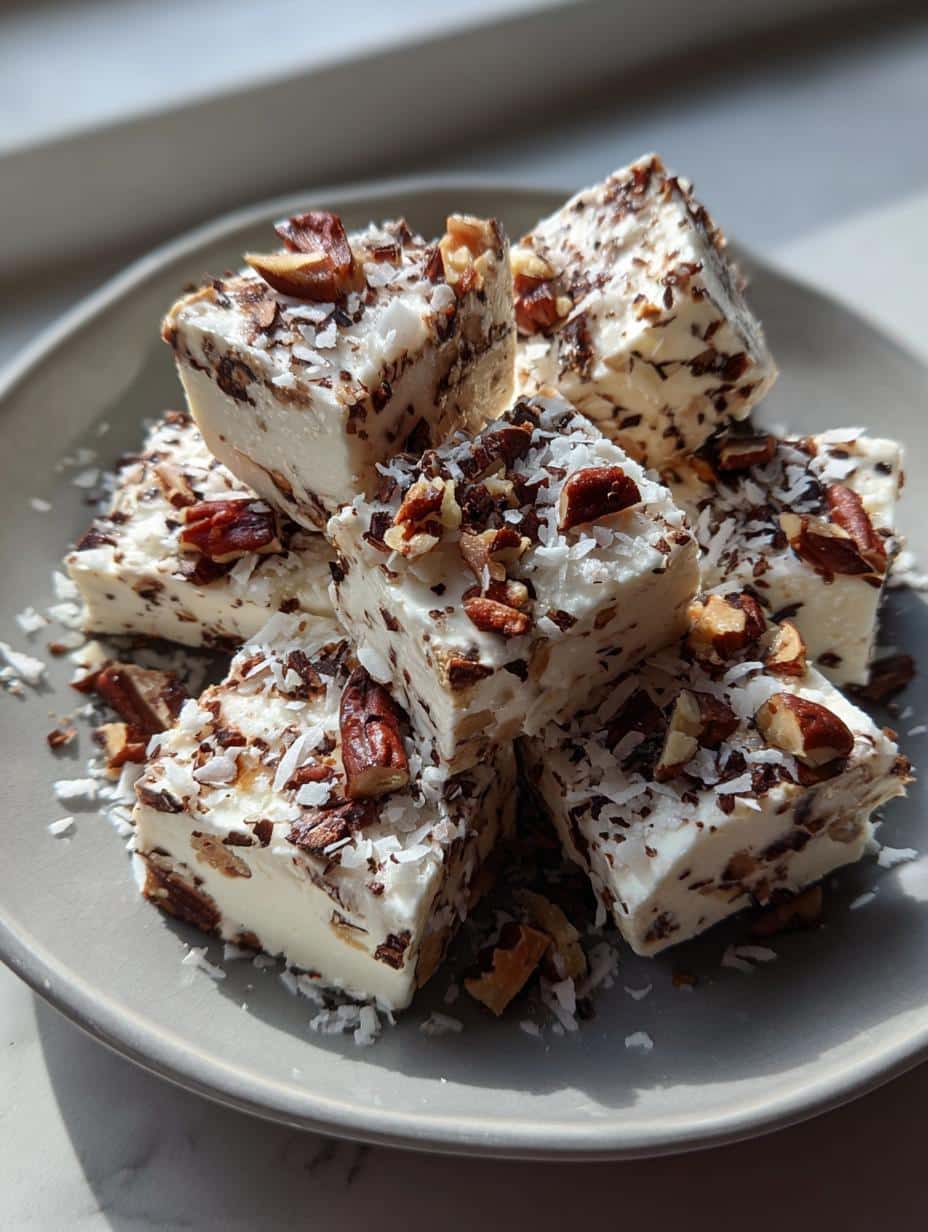
Ingredients List
Let’s gather our ingredients for this delightful holiday divinity candy! Each one plays a crucial role in creating that unforgettable, melt-in-your-mouth experience. Here’s what you’ll need:
- 2 cups sugar: This is the star of the show, providing the sweetness that makes divinity candy so irresistible.
- 1 cup corn syrup: This helps create that lovely smooth texture and prevents the sugar from crystallizing.
- 1/2 cup water: Just enough to help dissolve the sugar and get everything cooking nicely.
- 1/4 teaspoon salt: A pinch of salt will enhance the sweetness and balance the flavors beautifully.
- 1 teaspoon vanilla extract: This adds a warm, inviting flavor that complements the sweetness perfectly.
- 1 cup chopped nuts (optional): Feel free to choose your favorite nuts, whether it’s pecans, walnuts, or almonds. They add a lovely crunch!
- 1 cup shredded coconut (optional): This gives a tropical twist and a chewy texture that works wonders in the candy.
Make sure you have everything measured out and ready to go before you start cooking. It’ll make the process much smoother and more enjoyable!
How to Prepare Holiday Divinity Candy
Alright, let’s get into the fun part—making this fabulous holiday divinity candy! Follow these steps carefully, and I promise you’ll end up with a batch of candy that’ll make your heart sing and your taste buds dance. Ready? Let’s do this!
Combine the Ingredients
First things first! Grab a medium saucepan and toss in the 2 cups of sugar, 1 cup of corn syrup, 1/2 cup of water, and 1/4 teaspoon of salt. Give it a gentle stir to combine everything. It’s like a sweet little reunion in that pan! Make sure the sugar is evenly distributed before we start heating things up.
Cook the Mixture
Now, place the saucepan over medium heat. You’ll want to keep stirring until the sugar dissolves completely—this usually takes just a few minutes. Don’t rush this part! Once you see that the mixture is bubbling and gleaming, it’s time to let it do its thing. Bring it to a boil, but just a heads up, don’t stir it anymore after this point! We want to keep all that sugar smooth and silky.
Reach the Right Temperature
Here’s where the magic happens! You need to cook this bubbly goodness until it reaches 250°F, which is known as the hard ball stage. This is super important because it’s what gives your divinity that perfect texture! If you don’t have a candy thermometer, don’t worry—just keep an eye on it. You’re looking for that thick, syrupy consistency that can form a firm ball when dropped in cold water. It’s like a sweet science experiment!
Add Flavorings and Mix-Ins
Once you hit that magical temperature, carefully remove the saucepan from the heat. Now, it’s time to stir in the 1 teaspoon of vanilla extract—oh, the aroma is heavenly! If you’re feeling adventurous, this is also when you can add in your 1 cup of chopped nuts and 1 cup of shredded coconut if you’re using them. Mix everything in thoroughly, but be quick! You don’t want the mixture to cool too much before pouring it out.
Cool and Cut
Alright, grab a greased pan (a 9×9 inch works great) and pour your luscious mixture into it. Spread it out evenly with a spatula, and then let it cool completely—this usually takes about an hour. Once it’s set and cooled, it’s cutting time! Use a sharp knife to slice it into squares. I usually make them bite-sized because they’re so addictive! Trust me, you’ll want to enjoy them all!
Nutritional Information
Let’s talk about the numbers behind our delightful holiday divinity candy! While indulging in these sweet treats, it’s always good to know what we’re putting into our bodies. Here’s an estimated breakdown of the nutritional information per serving (one piece):
- Calories: 120
- Fat: 4g
- Saturated Fat: 1g
- Unsaturated Fat: 2g
- Trans Fat: 0g
- Sodium: 5mg
- Carbohydrates: 20g
- Fiber: 0g
- Protein: 1g
- Cholesterol: 0mg
- Sugar: 20g
Keep in mind, these numbers can vary based on any additional mix-ins you decide to add, like nuts or coconut. But one thing’s for sure—every piece is a sweet little burst of joy during the holiday season!
Tips for Success
Making holiday divinity candy can be a joyful experience, but there are a few tricks that can help you avoid common pitfalls and ensure your candy turns out perfectly every time. Trust me, these tips will make the process smoother and more enjoyable!
Use a Candy Thermometer
If you can, invest in a good candy thermometer. It’s the key to getting that perfect 250°F. If you don’t have one, just remember to keep a close eye on the mixture as it boils. You want it to be thick enough to hold a firm ball shape when dropped in cold water. This little gadget can save you from guessing and ensure your divinity has the right texture!
Don’t Rush the Cooling Process
Letting your mixture cool completely before cutting is crucial. I know it can be tempting to dive in right away, but if you cut it too soon, it might not hold its shape. Give it that full hour to set, and you’ll be rewarded with perfectly cut squares that won’t crumble apart!
Choose the Right Pan
Make sure to use a greased pan that’s the right size—9×9 inches is perfect for this recipe. If the pan is too big, your candy will be too thin and might not set properly. If it’s too small, it could overflow. A well-chosen pan makes all the difference!
Humidity Matters
Keep an eye on the weather! Humidity can affect candy making, especially when it comes to divinity. If it’s a particularly humid day, your candy might not set as well. If you know it’s going to be rainy, consider waiting for a drier day to make your holiday divinity candy!
Have Fun with Mix-Ins
Don’t be afraid to get creative with your mix-ins! While nuts and coconut are classic, you can experiment with your favorite dried fruits, crispy rice cereal, or even a sprinkle of holiday spices like cinnamon or nutmeg. Just remember to keep the total volume the same, so the texture stays just right.
With these tips, you’ll be well on your way to mastering holiday divinity candy. Enjoy the process, and don’t forget to share (or not!) those delicious treats with your loved ones!
Variations of Holiday Divinity Candy
Oh, the fun you can have with holiday divinity candy! While the classic recipe is absolutely divine on its own, there’s something so exciting about putting your own twist on it. Let’s explore some delicious variations that’ll take your candy to new heights of flavor and festivity!
Nutty Delights
If you’re a fan of nuts, why not switch things up? Instead of the usual chopped pecans or walnuts, try using toasted hazelnuts or macadamia nuts for a rich, buttery flavor. You could even mix in a blend of different nuts for a delightful crunch in every bite. Just remember to chop them roughly, so you get those lovely little surprises of nuttiness throughout your candy!
Fruit Fusion
For a fruity twist, consider adding dried fruits to your divinity candy! Chopped dried cherries or cranberries can add a lovely tartness that balances the sweetness beautifully. You could also try diced apricots or even some zesty candied ginger for an unexpected kick. Just make sure to keep the total volume the same to maintain that perfect texture!
Spicy Kick
If you love a little warmth in your sweets, why not sprinkle in some spices? A touch of ground cinnamon or nutmeg can add a cozy, holiday flavor that’s simply irresistible. You could even try a hint of cayenne pepper for a surprising kick! Just a pinch will do—sometimes it’s the little things that make a big difference!
Chocolate Lovers’ Dream
How about a chocolatey version? Fold in some mini chocolate chips or drizzle melted chocolate over the top of your cooled divinity squares for a decadent finish. You could also use cocoa powder in the base for a chocolate-flavored divinity—imagine that fluffy, sweet cloud with a rich chocolatey taste. Yum!
Seasonal Sprinkles
Get festive with some colorful sprinkles! Once your candy is poured into the pan, sprinkle some festive holiday-themed sprinkles on top before it sets. Not only do they add a fun pop of color, but they also bring a little extra joy to your sweet treats. Perfect for holiday gatherings or gifting!
With these variations, your holiday divinity candy will be anything but ordinary. Each new addition brings its own charm and character, making this already delightful treat even more special. So go ahead, get creative, and let your imagination run wild in the kitchen! You’ll end up with a candy that’s uniquely yours and just as sweet as the memories you’ll create while making it.
Serving Suggestions
When it comes to enjoying your fabulous holiday divinity candy, the possibilities are endless! Here are some delightful serving suggestions that’ll enhance your candy experience and make your festive gatherings even more memorable.
Pair with Hot Cocoa
There’s nothing quite like a warm cup of hot cocoa to complement the sweetness of holiday divinity candy. The rich, chocolatey flavor pairs beautifully with the fluffy texture of the candy. You can even top your cocoa with a dollop of whipped cream and a sprinkle of cocoa powder for that extra touch of cozy indulgence!
Make a Festive Dessert Platter
Elevate your candy by creating a stunning dessert platter! Arrange your holiday divinity candy alongside other sweet treats like gingerbread cookies, peppermint bark, and sugar cookies. This colorful spread will be a hit at any holiday party and gives everyone a chance to sample a little bit of everything.
Serve with Fresh Fruit
Balance the sweetness of the candy with some fresh fruit. Slices of crisp apples or juicy pears provide a refreshing contrast. You could also include some seasonal fruits like pomegranate seeds or mandarin oranges for a pop of color and a bright, zesty flavor that pairs wonderfully with the candy’s sweetness.
Gift Boxes for Friends and Family
Why not spread the joy of holiday divinity candy by gifting it? Package the squares in cute holiday-themed boxes or tins, and add a little card with a personal note. It’s a heartfelt way to share your love for this delightful treat with friends, family, or neighbors. Who wouldn’t love receiving a taste of homemade sweetness during the holidays?
Enjoy with a Cup of Tea
Pair your divinity candy with a soothing cup of herbal or spiced tea. The warm, fragrant notes of chai or peppermint tea will beautifully complement the candy’s sweetness, creating a relaxing treat to enjoy while cozying up by the fireplace. Perfect for those quiet evenings at home!
These serving suggestions will surely elevate your holiday divinity candy experience and create lasting memories with loved ones during this festive season. Enjoy every sweet moment!
Storage & Reheating Instructions
Now that you’ve made a fabulous batch of holiday divinity candy, let’s talk about how to keep it fresh and delightful! Proper storage is key to ensuring that your candy stays as tasty as the day you made it. Trust me, you’ll want to savor every last piece!
First things first, be sure to let your divinity candy cool completely before storing it. Once it’s set, grab an airtight container—this is crucial! You’ll want to place a piece of parchment paper between layers of candy if you have a lot, so they don’t stick together. This simple trick keeps them looking pretty and makes it easy to grab one (or two!) when the mood strikes.
Store the container in a cool, dry place, away from direct sunlight. If you live in a warmer climate, consider putting it in the fridge, but let it come back to room temperature before enjoying. This will help maintain that fluffy texture we all love.
Now, if you happen to have leftovers (which is always a question mark in my house!), they can last for about a week or so in the pantry. However, if it’s particularly humid, I recommend eating them sooner rather than later, as moisture can affect that delightful texture.
As for reheating, there’s really no need for it! Holiday divinity candy is best enjoyed at room temperature. If you find they’ve become a tad too sticky after a few days, just pop them in the fridge for a short while to firm them up again. But honestly, they’re so tasty, I doubt you’ll have any left to worry about!
So go ahead, store those sweets safely, and enjoy the delightful treat you’ve created whenever the craving hits!
Why You’ll Love This Recipe
- Festive Appeal: Holiday divinity candy is a classic treat that brings a sprinkle of joy and nostalgia to your holiday gatherings. Its fluffy texture and sweet flavor make it a hit with everyone!
- Easy to Prepare: With just a few simple ingredients and straightforward steps, you can whip up a batch of this delightful candy in no time. Perfect for both beginner and seasoned candy makers!
- Customizable: You can easily tweak the recipe to suit your taste by adding your favorite nuts, dried fruits, or spices. This means every batch can be uniquely yours!
- Great for Gifting: Holiday divinity candy makes for a thoughtful and delicious gift. Package it up in festive boxes, and you’ll spread smiles and sweetness to family and friends.
- Long-Lasting Treat: Properly stored, this candy can last for days, allowing you to enjoy the holiday spirit well beyond the festivities.
- Perfect for Sharing: The bite-sized squares are ideal for sharing at parties or gatherings. Everyone will love reaching for a piece (or two!) of this delightful candy!
For more delicious recipes, check out my Pinterest page!
Print
Holiday Divinity Candy: 5 Sweet Reasons to Love It
- Total Time: 45 minutes
- Yield: 24 pieces 1x
- Diet: Vegetarian
Description
A sweet and festive candy perfect for the holiday season.
Ingredients
- 2 cups sugar
- 1 cup corn syrup
- 1/2 cup water
- 1/4 teaspoon salt
- 1 teaspoon vanilla extract
- 1 cup chopped nuts (optional)
- 1 cup shredded coconut (optional)
Instructions
- Combine sugar, corn syrup, water, and salt in a saucepan.
- Cook over medium heat, stirring until sugar dissolves.
- Bring to a boil and cook without stirring until it reaches 250°F (hard ball stage).
- Remove from heat and stir in vanilla extract.
- Add nuts and coconut if desired.
- Pour mixture into a greased pan and let it cool.
- Once cooled, cut into squares and serve.
Notes
- Store in an airtight container.
- Can be made a few days in advance.
- Experiment with different nuts or dried fruits.
- Prep Time: 15 minutes
- Cook Time: 30 minutes
- Category: Candy
- Method: Stovetop
- Cuisine: American
Nutrition
- Serving Size: 1 piece
- Calories: 120
- Sugar: 20g
- Sodium: 5mg
- Fat: 4g
- Saturated Fat: 1g
- Unsaturated Fat: 2g
- Trans Fat: 0g
- Carbohydrates: 20g
- Fiber: 0g
- Protein: 1g
- Cholesterol: 0mg