
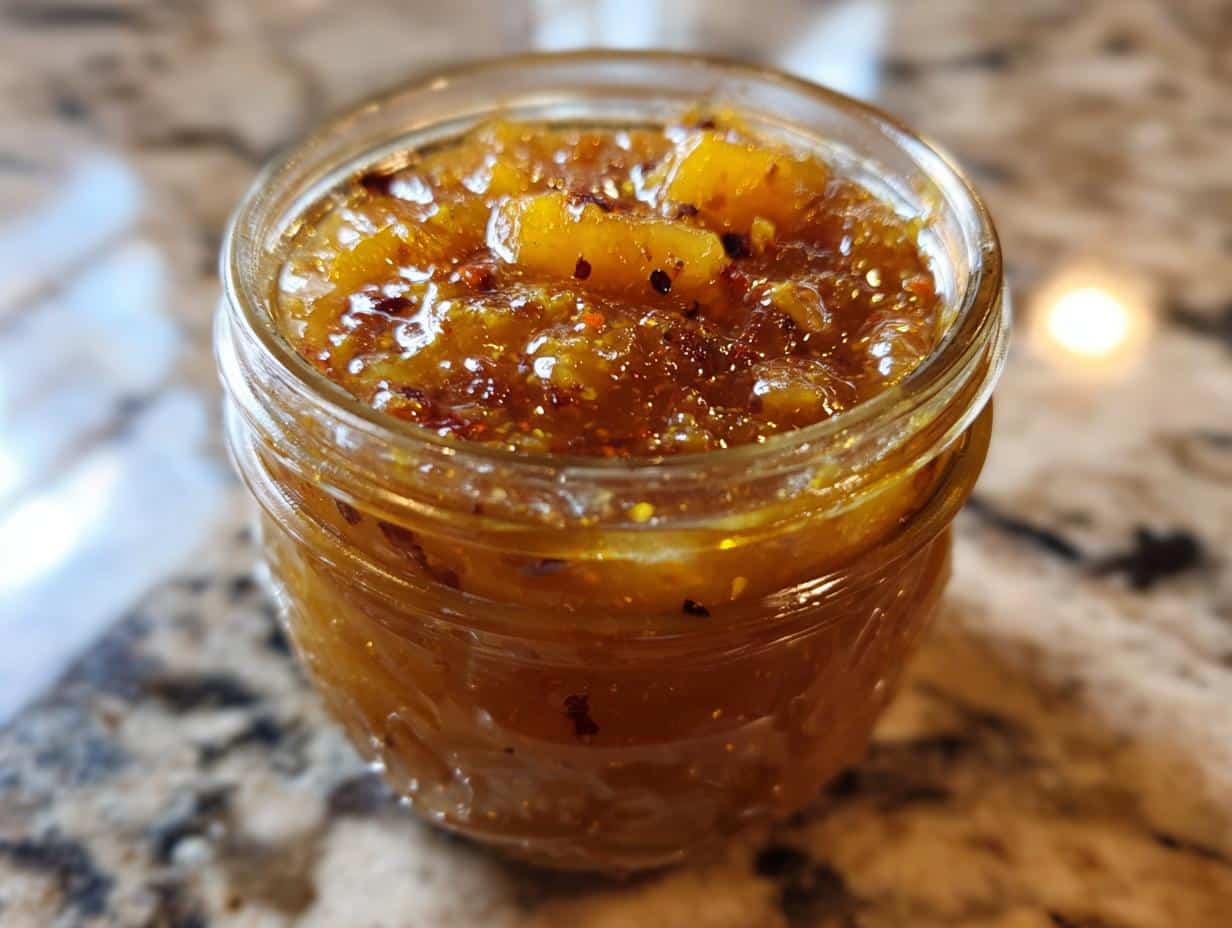
There’s just something magical about making Homemade Apple Pie Jam that warms my heart every time. The moment you slice into those crisp, juicy apples and feel their sweetness, you know you’re about to create something special. It’s like capturing the essence of a cozy fall day in a jar! I remember the first time I tried my hand at making jam; my kitchen was filled with the comforting aroma of cinnamon and nutmeg, instantly transporting me to my grandmother’s kitchen. She would always say that the best jams come from the heart, and I couldn’t agree more. This jam is not just a spread; it’s a hug for your toast, pancakes, or even a spoonful straight from the jar! So, roll up your sleeves, and let’s dive into this delightful adventure of creating Homemade Apple Pie Jam that’ll bring the warm flavors of apple pie to your pantry, one jar at a time.
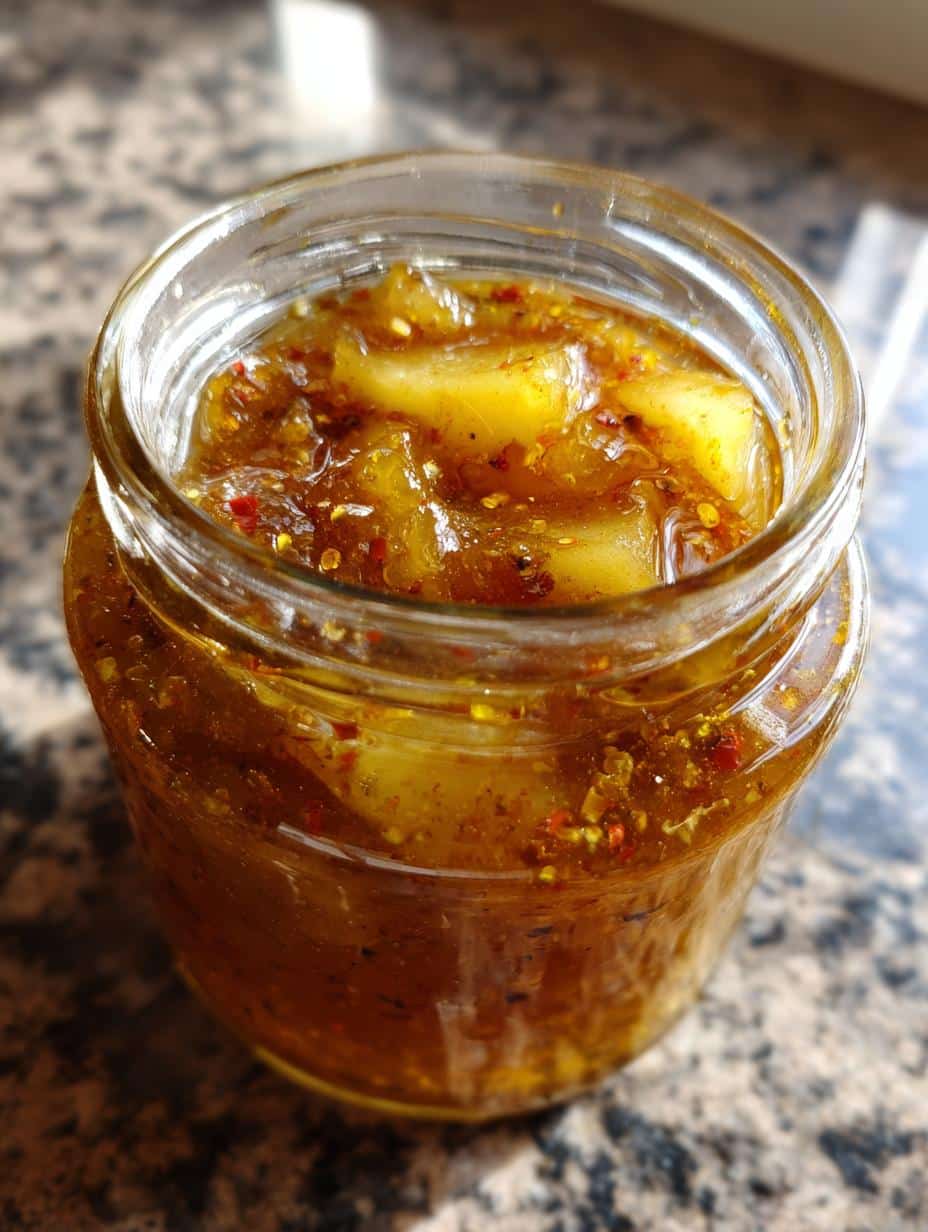
Ingredients for Homemade Apple Pie Jam
To make your delightful Homemade Apple Pie Jam, you’ll need the following ingredients:
- 4 cups diced apples – Make sure to choose firm apples for the best texture.
- 2 cups sugar – This will sweeten the jam beautifully.
- 1 tablespoon lemon juice – A splash of acidity to brighten the flavors.
- 1 teaspoon ground cinnamon – The warm spice that really captures that apple pie essence.
- 1/2 teaspoon ground nutmeg – For that cozy, comforting flavor.
- 1/4 teaspoon cloves – Just a hint of clove for depth.
- 1 packet fruit pectin – This helps the jam set perfectly.
Gather these goodies, and you’re well on your way to creating a jam that tastes just like a slice of warm apple pie! Trust me, the combination of these ingredients will fill your kitchen with the sweetest aromas.
How to Prepare Homemade Apple Pie Jam
Making Homemade Apple Pie Jam is a delightful process, and I can’t wait to guide you through it step by step. Trust me, it’s easier than you might think, and the results are simply heavenly!
Preparing Your Jars
First things first, let’s get those jars ready for canning! I like to start by washing my jars and lids in hot, soapy water. Rinse them thoroughly, and then place them in a large pot of boiling water for about 10 minutes. This sterilization step is crucial for safe canning. If you have a dishwasher, running them through a hot cycle can do the trick too! Once they’re sterilized, keep them warm in the oven at a low temperature until you’re ready to fill them. Nothing beats the feeling of knowing your jars are prepped and ready to go!
Cooking the Apples
Now, let’s dive into the yummy part! In a large pot, combine your diced apples, sugar, lemon juice, and those delightful spices: cinnamon, nutmeg, and cloves. I love to give it a good stir, making sure everything is well mixed. Then, turn the heat to medium and let it cook. You’ll want to keep an eye on it and stir occasionally, allowing the apples to soften, which usually takes about 10-15 minutes. Oh, the sweet aroma wafting through your kitchen will be irresistible!
Adding Pectin and Boiling
Once your apples are nicely softened, it’s time to add the magic ingredient: fruit pectin! Sprinkle it in while stirring gently to combine. Now, here’s the important part: bring the mixture to a full rolling boil. You’ll want to follow the instructions on the pectin package for timing, but typically, you’ll need to keep it boiling vigorously for about 1-2 minutes. This step is crucial for achieving that perfect jam consistency!
Filling the Jars
Now comes the fun part – filling those jars! Carefully ladle the hot apple pie jam into your prepared jars, leaving about 1/4 inch of headspace at the top. This little gap is important for sealing later. I like to use a funnel to make this step mess-free. You’ll want to wipe down the rims of the jars with a clean cloth to ensure a good seal.
Sealing and Processing
Finally, it’s time to seal those jars! Place the lids on top and screw on the bands until they’re fingertip-tight. Now, process your jars in a water bath for about 10 minutes to ensure they seal properly. This step also helps preserve that lovely flavor. Once done, carefully remove the jars and let them cool completely on a clean towel or cooling rack. You’ll hear those satisfying pops as the jars seal, and that’s when you know you’ve created something truly special!
Nutritional Information
When it comes to enjoying Homemade Apple Pie Jam, it’s always good to know what you’re putting into your body. Here’s a rough estimate of the nutritional values per tablespoon of this delicious jam:
- Calories: 50
- Fat: 0g
- Protein: 0g
- Carbohydrates: 13g
- Sugar: 12g
- Sodium: 1mg
- Fiber: 0g
- Cholesterol: 0mg
Keep in mind that these values are estimates and can vary based on the specific ingredients you use, like the type of apples or any adjustments you make to the sugar. But one thing’s for sure: this jam is a sweet treat that brings a smile with every spoonful!
FAQ About Homemade Apple Pie Jam
How long does Homemade Apple Pie Jam last?
Your Homemade Apple Pie Jam is not just a seasonal delight; when properly canned, it can last for up to a year on your pantry shelf! Just make sure to store it in a cool, dark place to maintain its flavor and freshness. Once you open a jar, it will stay delicious in the refrigerator for about three weeks. You’ll want to savor every last spoonful, so I recommend marking the date on the lid to keep track of its freshness!
Can I use other fruits for this jam?
Absolutely! While this recipe shines with apples, you can play around with other fruits to create your very own twist on Homemade Apple Pie Jam. Pears work beautifully alongside apples for a lovely combination, or you could try adding a handful of fresh cranberries for a tart kick. Just remember to adjust the sugar levels based on the sweetness of the fruit you choose. The world of jam-making is your oyster, so get creative!
What is the best way to store Homemade Apple Pie Jam?
The best way to store your Homemade Apple Pie Jam is in a cool, dry place, away from direct sunlight. Once you’ve opened a jar, keep it in the refrigerator with the lid tightly sealed to maintain its flavor and prevent spoilage. I like to use glass jars for storage since they’re easy to clean and don’t absorb any odors. If you’ve got leftovers, don’t worry—you can also use the jam as a topping for desserts, or blend it into yogurt or oatmeal for a delicious breakfast treat!
Why You’ll Love This Homemade Apple Pie Jam
- Quick Preparation: Whip up this jam in just about 50 minutes, making it a perfect weekend project!
- Delicious Flavor: Experience the warm, comforting taste of apple pie in every spoonful, with the perfect blend of spices.
- Versatility: Use it on toast, pancakes, or as a filling for desserts—it elevates any dish!
- Great Gift Idea: Share the joy of homemade goodness with friends and family by gifting jars of this delightful jam.
- Seasonal Delight: Capture the essence of fall all year round with this sweet preserve!
Tips for Success with Homemade Apple Pie Jam
Making Homemade Apple Pie Jam is a joy, but a few handy tips can take your jam from good to absolutely fantastic! Here are some of my best suggestions to ensure your jam turns out perfectly every time:
- Choose the Right Apples: Go for firm, tart apples like Granny Smith or Honeycrisp for the best flavor and texture. Mixing varieties can also add depth to your jam!
- Adjust the Sugar: If you prefer a less sweet jam, feel free to reduce the sugar a bit. Just remember that sugar helps with preservation, so don’t cut it too much!
- Spice it Up: Experiment with spices to suit your taste! If you’re a fan of ginger or allspice, adding a pinch can give your jam a unique twist.
- Watch the Cooking Time: Keep an eye on your apples as they cook. You want them softened but not mushy, so stir occasionally to check their progress.
- Test for Doneness: Use a spoon to drop a bit of the jam on a cold plate. If it holds its shape and wrinkles when you push it with your finger, you’re ready to jar it up!
- Don’t Skip the Headspace: Leaving enough headspace when filling your jars is crucial for a good seal. Aim for about 1/4 inch to allow for expansion.
- Label Your Jars: Once cooled, don’t forget to label your jars with the date and contents. It makes it easier to keep track of your pantry and adds a lovely personal touch!
With these tips in your back pocket, you’ll be well on your way to mastering the art of jam-making! Enjoy the process and the sweet rewards of your hard work.
Variations of Homemade Apple Pie Jam
One of the best things about making Homemade Apple Pie Jam is how flexible the recipe can be! You can easily tweak it to suit your tastes or even the season. Here are some fun variations to consider:
- Spiced Apple Cranberry Jam: For a tart twist, add 1 to 2 cups of fresh or frozen cranberries to the mix. They not only add a beautiful color but also a zesty flavor that pairs wonderfully with the sweetness of the apples.
- Apple Pie Jam with a Kick: If you enjoy a bit of heat, try adding a pinch of cayenne pepper or some finely chopped jalapeños. Just a little will go a long way in giving your jam an unexpected and delightful kick!
- Nutty Addition: Toss in some finely chopped pecans or walnuts for a bit of crunch. They add texture and a lovely nutty flavor that complements the apples beautifully.
- Maple Apple Pie Jam: Swap out half of the sugar for pure maple syrup. This not only adds a deep, rich flavor but also gives your jam a unique twist that’s reminiscent of cozy breakfasts.
- Vanilla Bean Infusion: For a luscious touch, add the seeds from a vanilla bean or a splash of vanilla extract when cooking the apples. It elevates the flavor profile and adds a lovely aroma.
- Autumn Spice Jam: Enhance the spice blend by adding allspice or cardamom along with the cinnamon and nutmeg. This creates a deeper, more complex flavor that’s perfect for fall.
Feel free to mix and match these ideas or even come up with your own variations! The joy of making jam lies in experimenting and discovering new flavors that you adore. Happy jamming!
What to Serve with Homemade Apple Pie Jam
When it comes to enjoying your Homemade Apple Pie Jam, the possibilities are endless! This sweet and spiced delight pairs beautifully with a variety of foods, making it a versatile addition to your kitchen. Here are some of my favorite ways to serve it:
- Toast: Spread a generous layer on warm, crispy toast for a simple yet satisfying breakfast or snack. The jam melts into the bread, creating a heavenly combination!
- Pancakes or Waffles: Top your fluffy pancakes or waffles with a dollop of this jam instead of syrup. It adds a delightful twist that will have everyone coming back for seconds.
- Yogurt Parfaits: Mix a spoonful of apple pie jam into your morning yogurt for a flavorful kick. Layer it with granola and fresh fruit for a delicious and wholesome breakfast.
- Cheese Boards: Add the jam to a charcuterie or cheese board. It pairs wonderfully with sharp cheeses like cheddar or creamy brie, providing a lovely contrast of flavors.
- Desserts: Use the jam as a filling for pastries, like turnovers or tarts, or swirl it into your favorite cheesecake for a delicious twist on classic recipes.
- Ice Cream Topping: Drizzle some over vanilla ice cream or yogurt for a quick and delightful dessert. The warm jam contrasts beautifully with the cold creaminess!
With these serving suggestions, you can elevate your meals and snacks with the warm, comforting flavors of Homemade Apple Pie Jam. Enjoy experimenting with these pairings, and don’t hesitate to get creative!
Storage & Reheating Instructions for Homemade Apple Pie Jam
Once you’ve made your Homemade Apple Pie Jam, you’ll want to store it properly to keep that delicious flavor intact! Here’s how to make sure your jam stays fresh and ready to enjoy:
First off, make sure your jars are completely cool after processing. Once they are, store your sealed jars in a cool, dark place like a pantry or cupboard. The ideal temperature for storing homemade jams is around 50-70°F (10-21°C). If you’ve got a cellar, that’s a perfect spot! Just like with Grandma’s old-fashioned methods, keeping the light and heat away helps to preserve the vibrant flavors and lovely color of your jam.
Once you crack open a jar, it’s time to move it to the refrigerator. An opened jar will stay fresh for about three weeks, so keep it tightly sealed to maintain its deliciousness. You might want to put a little label on the jar with the date you opened it, just to keep track!
Now, when it comes to using your jam, the options are endless! If you find your jam has thickened up a bit after chilling, you can gently reheat it. Just scoop out the amount you need into a small saucepan and warm it over low heat, stirring occasionally. This will help bring back that lovely spreadable consistency. You can also pop it in the microwave for about 15-20 seconds, but be sure to use a microwave-safe container and stir it well to avoid hot spots.
And don’t forget, there are so many ways you can enjoy your Homemade Apple Pie Jam! Spread it on toast, mix it into yogurt, or use it as a topping for desserts. You could even swirl it into oatmeal for a cozy breakfast! Enjoy every last bit of your delightful creation, and don’t hesitate to share with friends and family—they’ll love it just as much as you do!
For more delightful recipes and inspiration, check out our website or follow us on Facebook!
Print
Homemade Apple Pie Jam: 7 Ways to Capture Fall in a Jar
- Total Time: 50 minutes
- Yield: 6 half-pint jars 1x
- Diet: Vegetarian
Description
Homemade Apple Pie Jam is a sweet and spiced fruit preserve that captures the essence of apple pie in a jar.
Ingredients
- 4 cups diced apples
- 2 cups sugar
- 1 tablespoon lemon juice
- 1 teaspoon ground cinnamon
- 1/2 teaspoon ground nutmeg
- 1/4 teaspoon cloves
- 1 packet fruit pectin
Instructions
- Prepare jars and lids for canning.
- In a large pot, combine diced apples, sugar, lemon juice, and spices.
- Cook over medium heat until apples soften.
- Add fruit pectin and stir well.
- Bring to a boil and cook for the time specified on the pectin package.
- Pour into prepared jars, leaving headspace.
- Seal jars and process in a water bath for 10 minutes.
- Let cool before storing.
Notes
- Use firm apples for best results.
- Adjust spices according to your taste.
- Store in a cool, dark place.
- Prep Time: 30 minutes
- Cook Time: 20 minutes
- Category: Preserves
- Method: Canning
- Cuisine: American
Nutrition
- Serving Size: 1 tablespoon
- Calories: 50
- Sugar: 12g
- Sodium: 1mg
- Fat: 0g
- Saturated Fat: 0g
- Unsaturated Fat: 0g
- Trans Fat: 0g
- Carbohydrates: 13g
- Fiber: 0g
- Protein: 0g
- Cholesterol: 0mg