
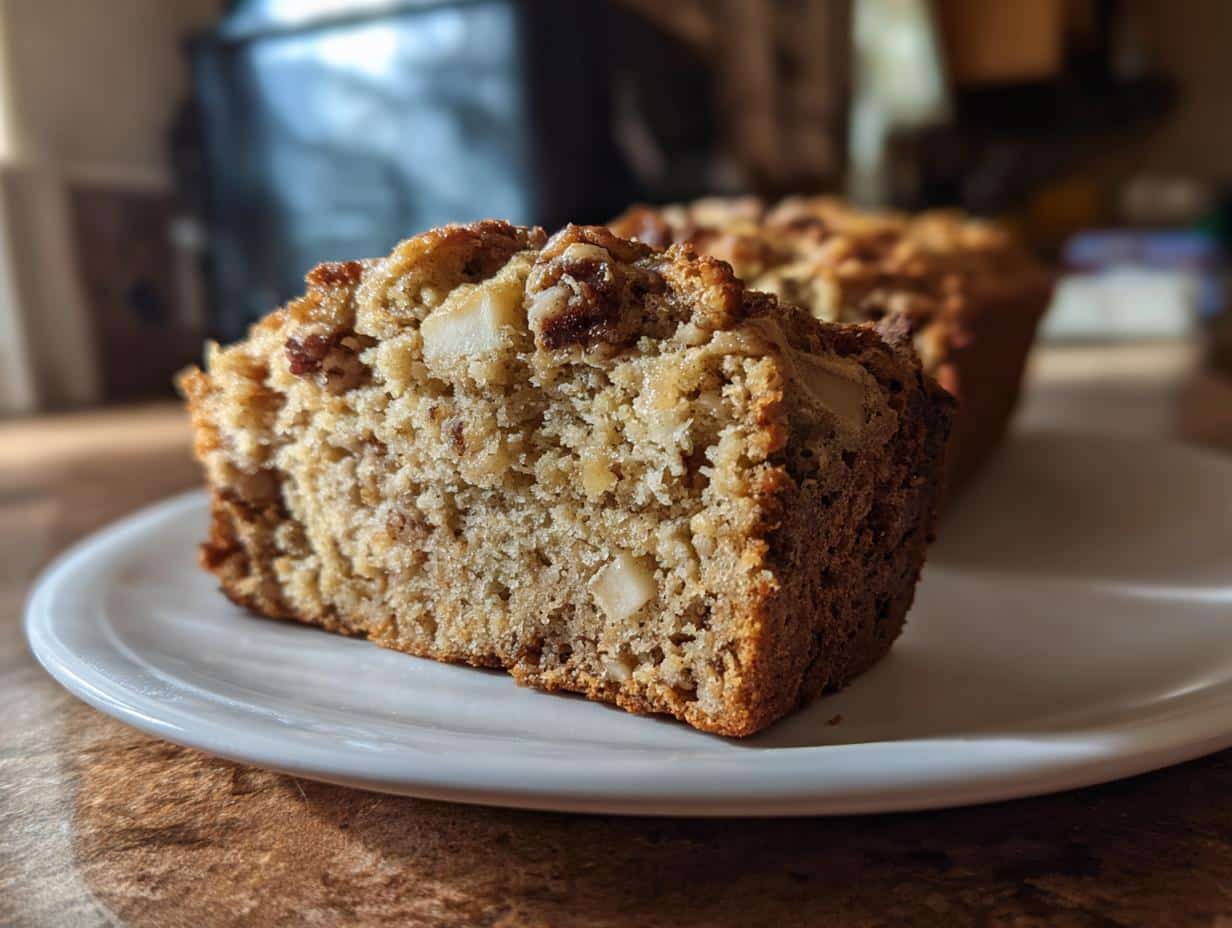
Oh, there’s something truly magical about baking Apple Bread as the leaves start to turn and the air gets that crisp autumn bite! I can practically smell the sweet aroma wafting through my kitchen as soon as I mix those warm spices with fresh apples. It’s like a hug in loaf form! This recipe holds a special place in my heart because it brings back memories of cozy family gatherings and the simple joy of sharing a slice with loved ones. The combination of tender, moist bread and the delightful crunch of apples makes it the perfect treat for fall. Trust me, once you take that first warm bite, you’ll understand why Apple Bread is a seasonal favorite that deserves a spot on your table!
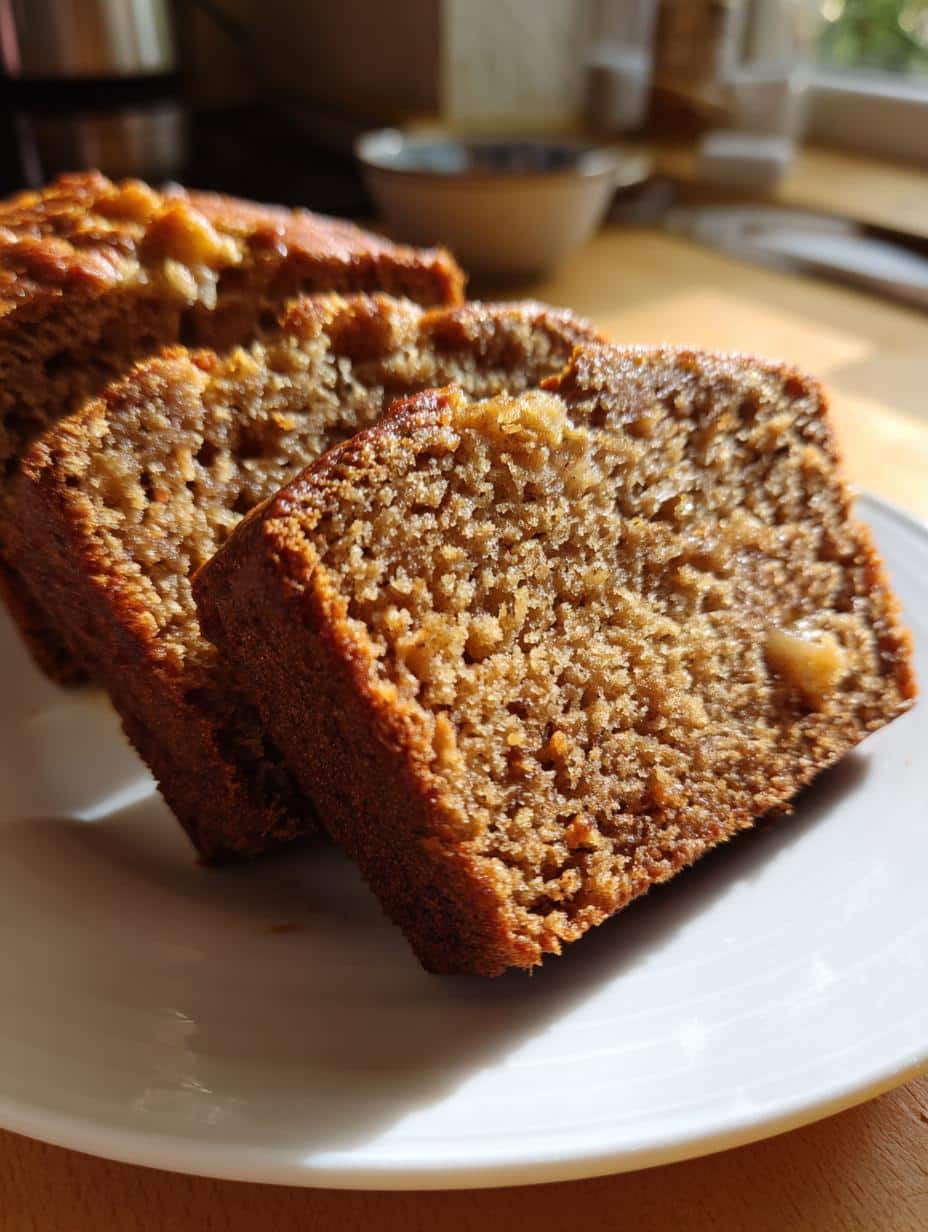
Ingredients for Apple Bread
To whip up this delightful Apple Bread, you’ll need some simple yet essential ingredients. Here’s what you’ll want to gather:
- 2 cups all-purpose flour
- 1 cup granulated sugar
- 1/2 cup unsalted butter, softened to room temperature for easy creaming
- 2 large eggs
- 1 teaspoon vanilla extract
- 1 teaspoon baking soda
- 1/2 teaspoon salt
- 1 teaspoon ground cinnamon
- 2 cups chopped apples (I love using a mix of sweet and tart varieties for extra flavor!)
These ingredients come together to create a moist, spiced loaf that perfectly captures the essence of fall. Make sure your apples are fresh and crisp, as they’ll add that lovely texture and flavor to your bread!
How to Prepare Apple Bread
Now that you’ve got your ingredients ready, let’s dive into the steps for making this scrumptious Apple Bread! Follow along with me, and I promise you’ll have a delightful loaf in no time.
Preheat the Oven
First things first, you’ll want to preheat your oven to 350°F (175°C). Trust me, this step is crucial because you want that nice, even heat as soon as your batter hits the pan. Preheating ensures that the bread rises beautifully while baking!
Cream Butter and Sugar
In a large bowl, take your softened butter and granulated sugar and cream them together. I like to use a sturdy wooden spoon or a hand mixer for this. You want to beat them until the mixture turns light and fluffy—think of it like whipping up a cloud! This process usually takes about 2-3 minutes. The fluffiness helps to incorporate air, which is key for a light texture in your bread.
Incorporate Eggs and Vanilla
Next, add in the two large eggs and the teaspoon of vanilla extract. Mix everything together until it’s well combined. At this stage, the batter will start to look a bit smoother and more cohesive. Don’t rush this part; really take a moment to ensure everything is blended nicely!
Combine Dry Ingredients
In a separate bowl, whisk together the flour, baking soda, salt, and ground cinnamon. This step is important to ensure that your leavening agents and spices are evenly distributed throughout the bread. No one wants a mouthful of baking soda, right? A quick whisk will do the trick!
Mix Wet and Dry Ingredients
Now it’s time to combine the wet and dry ingredients. Gently stir the flour mixture into the wet ingredients until just combined. You want to avoid overmixing here; a few lumps are perfectly fine! Overmixing can lead to dense bread, and we definitely want it light and fluffy.
Fold in Chopped Apples
Here comes the fun part—folding in those lovely chopped apples! Use a spatula to gently incorporate them into the batter. Be careful not to overmix; you want those apple chunks to stay intact and give your bread that delicious fruity burst!
Pour into Loaf Pan and Bake
Pour your batter into a greased loaf pan. Make sure to spread it evenly so it bakes consistently. Pop it in the oven and let it bake for about 60-70 minutes. You can check for doneness by inserting a toothpick into the center. If it comes out clean or with just a few moist crumbs, it’s ready to come out!
Cooling and Slicing
Once your bread is done, let it cool in the pan for about 10-15 minutes before transferring it to a wire rack to cool completely. This step is crucial because it allows the texture to set just right. Wait a bit longer before slicing; I know it’s hard to resist, but trust me, the flavor is even better when it’s cool!
Tips for Success with Apple Bread
Now that you’re on your way to baking the perfect Apple Bread, let me share some tips that’ll take your loaf from good to absolutely fantastic!
Choosing the Right Apples
The type of apples you use can really make or break your bread. I always recommend a mix of sweet and tart varieties, like Granny Smith and Honeycrisp. This combo gives a lovely contrast in flavor and adds depth to your bread. Plus, the tart apples hold their shape well, which means you get those delicious apple chunks in every bite!
Don’t Skip the Spices
While ground cinnamon is the star of the show, don’t be afraid to experiment! A pinch of nutmeg or allspice can add a lovely warmth that enhances the fall flavors. Just a little bit goes a long way, so sprinkle carefully!
Proper Storage for Freshness
To keep your Apple Bread moist and delicious, store it in an airtight container at room temperature. It’ll stay fresh for up to a week! If you want to make it last even longer, consider freezing it. Just wrap slices in plastic wrap and pop them in a freezer bag. It’ll keep well for up to three months, and you can enjoy a slice of fall whenever the craving hits!
Let It Rest for Flavor
If you can resist the urge to slice into your bread right away, let it sit for a day! The flavors really deepen, making each bite even more scrumptious. Just remember to keep it covered to maintain that moist goodness!
With these tips in mind, you’ll be well on your way to mastering Apple Bread that not only fills your kitchen with heavenly scents but also warms the hearts of everyone who gets a slice. Happy baking!
Why You’ll Love This Recipe
This Apple Bread recipe isn’t just a treat; it’s a delightful experience that brings the essence of fall right into your kitchen. Here are some key reasons why you’ll adore making this recipe:
- Easy to Make: With simple ingredients and straightforward steps, even beginner bakers will shine with this recipe!
- Flavorful Explosion: The combination of fresh apples, warm spices, and a touch of vanilla creates a mouthwatering flavor that’s hard to resist.
- Perfect for Fall: It captures the cozy, comforting spirit of autumn, making it an ideal addition to your seasonal baking lineup.
- Versatile Ingredients: You can use any variety of apples you like, so feel free to get creative with what you have on hand!
- Great for Sharing: This bread is perfect for gatherings, brunches, or simply sharing with loved ones. Everyone will want a slice!
- Deliciously Moist: Thanks to the chopped apples and butter, every slice is wonderfully moist and tender, ensuring it stays fresh for days.
Trust me, once you bake this Apple Bread, you’ll find it hard to resist reaching for just one more slice!
Storage & Reheating Instructions
To keep your delightful Apple Bread as fresh as the day you baked it, storing it properly is key! Once the bread has completely cooled, wrap it tightly in plastic wrap or aluminum foil. Then, place it in an airtight container. This way, it’ll stay moist and delicious for up to a week at room temperature. I recommend keeping it on your kitchen counter, out of direct sunlight, to maintain that perfect texture.
If you find yourself with leftovers (though it’s hard to resist), you can also freeze your Apple Bread for longer storage. Just slice it first, then wrap each piece in plastic wrap before putting them in a freezer bag. It’ll keep well for about three months! When you’re ready to enjoy a slice, simply take it out and let it thaw at room temperature or pop it in the microwave for about 15-20 seconds. Voila! You’ll have a warm, comforting treat that tastes just like fresh-baked bread.
Don’t forget, if you decide to reheat the entire loaf, you can place it in a preheated oven at 350°F (175°C) for about 10-15 minutes. Just cover it with aluminum foil to prevent the crust from getting too brown. Trust me, your kitchen will smell heavenly again!
Nutritional Information
Before we dive into the deliciousness, let’s talk about the nutritional side of this Apple Bread! Keep in mind that these values are estimates and can vary based on the specific ingredients and brands you use. It’s always a good idea to double-check if you’re tracking your intake. Here’s what you can expect per slice:
- Calories: 210
- Sugar: 10g
- Sodium: 180mg
- Fat: 8g
- Saturated Fat: 5g
- Unsaturated Fat: 2g
- Trans Fat: 0g
- Carbohydrates: 32g
- Fiber: 1g
- Protein: 3g
- Cholesterol: 40mg
This Apple Bread is not only a tasty treat but also a delightful way to enjoy some wholesome ingredients! So, whether you’re indulging for breakfast or dessert, you can feel good about this fall favorite.
FAQ about Apple Bread
Got questions about making this scrumptious Apple Bread? No worries! I’m here to help with some of the most common questions I hear, along with a few tips and tricks to make sure your baking experience is smooth and enjoyable.
Can I use different types of apples for this recipe?
Absolutely! I love using a mix of sweet and tart apples, like Honeycrisp and Granny Smith, for the best flavor. Feel free to experiment with whatever you have on hand, just remember that firmer apples tend to hold up better during baking!
What if I don’t have unsalted butter?
If you only have salted butter, no problem! Just reduce the amount of salt you add in the recipe to keep the flavors balanced. The butter will still add that lovely richness to your bread!
Can I add nuts or raisins to the Apple Bread?
Sure thing! Chopped walnuts or pecans can add a delightful crunch, while raisins or dried cranberries bring a sweet chewiness. Just make sure to adjust the amount of apples slightly if you’re adding a lot of extras, so you don’t overwhelm the batter.
How do I know when my Apple Bread is done baking?
Great question! Besides the toothpick test, where you insert a toothpick into the center and it comes out clean, you can also look for a golden-brown crust and a slight pull away from the sides of the pan. If it springs back when lightly touched, it’s ready!
Can I make this recipe in advance?
Definitely! This Apple Bread is actually even better the next day as the flavors have time to meld. Just be sure to store it properly in an airtight container to keep it fresh. You can also freeze it for up to three months and enjoy it later!
What should I do if my batter is too thick?
If your batter seems too thick, don’t panic! You can add a tablespoon of milk or apple juice to loosen it up a bit. Just make sure not to overmix when you do this—gentle folding is key!
Hopefully, these answers help ease any concerns you might have. Baking should be a fun and stress-free experience, so don’t hesitate to reach out if you have more questions. Enjoy your baking adventure with this delightful Apple Bread!
Follow us on Facebook and check out our Pinterest for more delicious recipes!
Print
Apple Bread: 5 Reasons It’s the Perfect Fall Treat
- Total Time: 1 hour 15 minutes
- Yield: 1 loaf 1x
- Diet: Vegetarian
Description
Apple Bread is a moist and flavorful treat made with fresh apples and warm spices. It’s perfect for fall.
Ingredients
- 2 cups all-purpose flour
- 1 cup granulated sugar
- 1/2 cup unsalted butter, softened
- 2 large eggs
- 1 teaspoon vanilla extract
- 1 teaspoon baking soda
- 1/2 teaspoon salt
- 1 teaspoon ground cinnamon
- 2 cups chopped apples
Instructions
- Preheat your oven to 350°F (175°C).
- In a large bowl, cream the butter and sugar together.
- Add eggs and vanilla, mixing well.
- In another bowl, combine flour, baking soda, salt, and cinnamon.
- Add dry ingredients to wet ingredients, stirring until just combined.
- Fold in the chopped apples.
- Pour the batter into a greased loaf pan.
- Bake for 60-70 minutes or until a toothpick comes out clean.
- Let cool before slicing.
Notes
- Store in an airtight container for up to a week.
- Can be frozen for up to three months.
- Use any variety of apples you prefer.
- Prep Time: 15 minutes
- Cook Time: 1 hour
- Category: Dessert
- Method: Baking
- Cuisine: American
Nutrition
- Serving Size: 1 slice
- Calories: 210
- Sugar: 10g
- Sodium: 180mg
- Fat: 8g
- Saturated Fat: 5g
- Unsaturated Fat: 2g
- Trans Fat: 0g
- Carbohydrates: 32g
- Fiber: 1g
- Protein: 3g
- Cholesterol: 40mg