
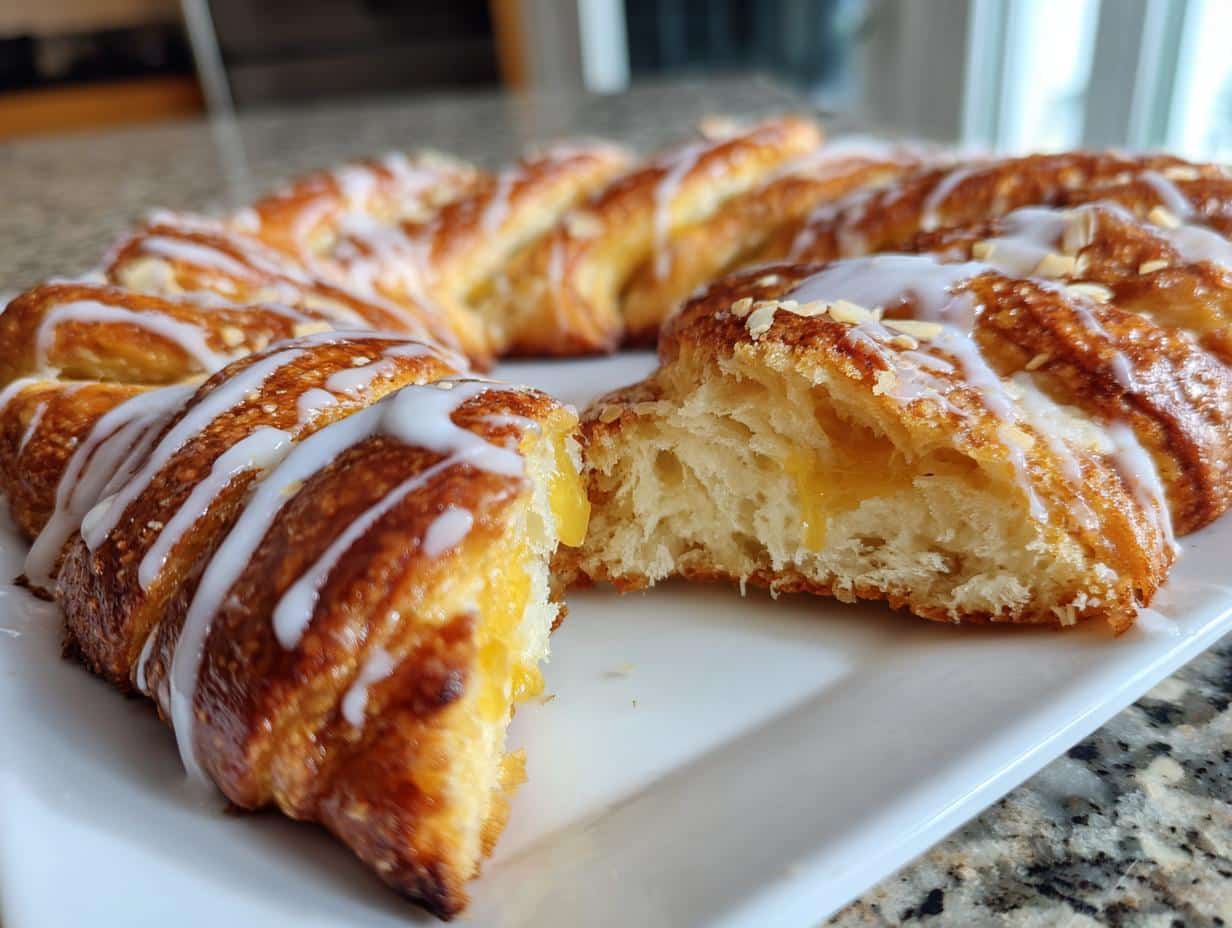
Oh, let me tell you about the joy of making Homemade Almond Kringle! This delightful pastry is like a warm hug right out of the oven, with its flaky, buttery layers that just melt in your mouth. The sweet almond filling? It’s pure bliss! Every time I whip this up, I can’t help but feel a wave of nostalgia wash over me, reminding me of cozy family gatherings where the aroma of fresh pastries filled the air.
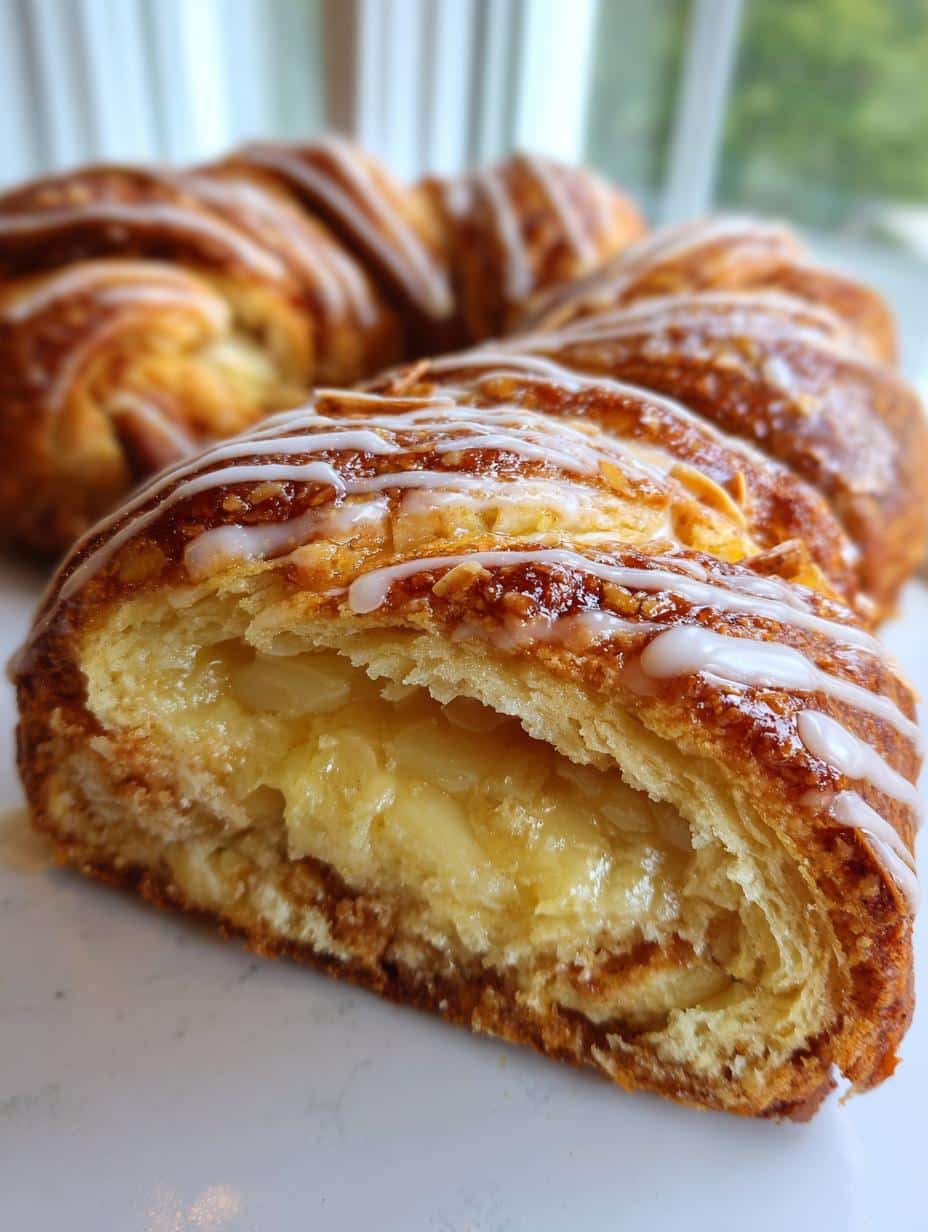
This recipe is special to me because it was passed down from my grandmother, who always said that no celebration was complete without her famous kringle. I remember standing on a stool in her kitchen, watching her work her magic, and now I get to create those same memories with my own family. It’s more than just a dessert; it’s a tradition that brings us all together.
What I love most about this Homemade Almond Kringle is how impressive it looks when it’s finished, yet it’s surprisingly easy to make! Once you take that first bite, you’ll understand why this flaky, buttery treat is a staple in my home. So, grab your apron and let’s dive into the wonderful world of kringle-making!
Ingredients List
Gathering the right ingredients is the first step to creating your Homemade Almond Kringle, and trust me, each one plays a crucial role in achieving that perfect flaky, buttery goodness. Here’s what you’ll need:
- 2 cups all-purpose flour: This is the backbone of your dough, giving it structure and that lovely flaky texture.
- 1/2 cup unsalted butter, chilled: The colder, the better! This helps create those lovely layers. Make sure it’s nice and firm when you start.
- 1/2 cup sour cream: This adds richness and moisture, keeping your kringle tender and delightful.
- 1 cup almond paste: This is the star of the show! It brings that sweet, nutty flavor that makes the kringle so special.
- 1/2 cup powdered sugar: For that sweet icing that drizzles beautifully over the top. You can adjust this to your taste!
- 1 teaspoon vanilla extract: A splash of vanilla adds warmth and depth to the flavor. You won’t regret it!
- 1 egg, beaten (for egg wash): This gives your kringle that gorgeous golden-brown finish that’s just irresistible.
Having everything prepped and measured makes the baking process so much smoother, so take a moment to enjoy this part. You’re going to love how these simple ingredients come together to create something truly spectacular!
How to Prepare Homemade Almond Kringle
Preparing your Homemade Almond Kringle is a delightful journey, and I promise you, it’s worth every step! The process might seem a bit intricate at first, but once you get into the rhythm of it, you’ll find it flows beautifully. Let’s break it down into clear, manageable steps so you can create this flaky, buttery pastry with confidence.
Step-by-Step Instructions
- Preheat your oven: Start by preheating your oven to 375°F (190°C). This way, it’s nice and hot when your kringle is ready to go in, ensuring a perfect bake!
- Mix flour and butter: In a large bowl, combine the all-purpose flour and chilled unsalted butter. Use a pastry cutter or your fingertips to mix until the mixture is crumbly, resembling coarse sand. Don’t rush this step; you want those tiny butter pieces to stay cold for that flaky texture!
- Add sour cream: Next, add the sour cream to the flour and butter mixture. Stir gently until a dough starts to form. It might look a bit shaggy, but that’s okay! You’re almost there.
- Chill the dough: Wrap the dough in plastic wrap and pop it in the fridge for about 30 minutes. Chilling helps the butter firm up again, which is key for flakiness!
- Roll out the dough: Once chilled, flour your work surface and roll the dough out into a rectangle about 1/4 inch thick. Don’t worry if it’s not perfect – a little rustic charm adds character!
- Spread almond paste: Now, take your almond paste and spread it evenly over the rolled-out dough, leaving a small border around the edges. This sweet filling is what makes your kringle truly special!
- Fold the dough: Fold the dough into thirds, like a letter. This creates those lovely layers that will give your kringle its signature flakiness. Roll it out again into a rectangle, just like before.
- Shape the kringle: Here comes the fun part! Shape the folded dough into a kringle by forming it into a circle or an oval. Pinch the ends together to seal, and place it on a baking sheet lined with parchment paper.
- Brush with egg wash: Give your kringle a beautiful golden finish by brushing the top with the beaten egg. This step is essential for that mouthwatering color!
- Bake: Bake your kringle in the preheated oven for 25-30 minutes, or until it’s golden brown and flaky. Your kitchen will smell heavenly during this time, so get ready for some serious temptation!
- Prepare the icing: While your kringle cools, mix the powdered sugar, vanilla extract, and just enough water to create a smooth icing. You want it to be pourable but not too runny.
- Drizzle the icing: Once the kringle is completely cool, drizzle that luscious icing over the top. Feel free to go wild – it’s part of the charm!
And there you have it! Each of these steps brings you closer to that delightful Homemade Almond Kringle that will surely impress your family and friends. Enjoy the process—baking is as much about the journey as it is about the delicious end result!
Why You’ll Love This Recipe
Oh, where do I even start with why you’ll absolutely adore this Homemade Almond Kringle? First off, the taste is simply out of this world! Imagine biting into a flaky, buttery pastry that’s perfectly sweet and filled with a rich almond paste. It’s a flavor explosion that dances on your taste buds and leaves you wanting more.
But it’s not just about the taste; it’s also about how easy it is to whip up! Seriously, the steps are straightforward, and while it might look fancy enough for a bakery, you’ll find it’s totally doable at home. You don’t have to be a pro to impress your family or friends with this delightful treat. Just follow along with the steps, and you’ll have a stunning kringle that looks like it came straight from a pastry shop!
This kringle is also perfect for special occasions. Whether it’s a birthday, holiday gathering, or just a cozy Sunday brunch, it brings a touch of elegance to any table. I love serving it alongside a cup of coffee or tea, watching everyone’s faces light up as they take that first bite. Trust me, it’s a showstopper that sparks joy and conversation!
Plus, it’s a wonderful way to create lasting memories with your loved ones. Baking together is such a special experience, and this kringle can be a part of those cherished moments. So, get ready to fall in love with this recipe—once you try it, you’ll understand why it’s a beloved favorite in my home!
Tips for Success
Now that you’re all set to make your Homemade Almond Kringle, let’s talk about a few tips to help ensure it turns out perfectly every single time. Trust me, these little nuggets of wisdom can make all the difference!
Chill Your Ingredients
First and foremost, don’t skip the chilling step for your butter and dough! Cold butter is the secret to achieving that flaky texture we all crave. It creates steam during baking, which helps those layers rise beautifully. So, keep your butter in the fridge until you’re ready to use it, and remember to chill the dough for that extra flakiness!
Don’t Overmix
When you’re mixing the flour and butter, be careful not to overmix! The goal is to get that crumbly texture without turning it into a dough ball. If you overwork it, you might end up with a tougher pastry instead of the light and flaky one we’re aiming for. Just mix until everything is combined and let the dough do its thing!
Use Quality Almond Paste
Speaking of filling, make sure you choose a high-quality almond paste. This is the heart of your kringle, and using a good brand will elevate the flavor to a whole new level. You want that sweet, nutty goodness to shine through, so don’t skimp on this ingredient!
Mind the Baking Time
Keep an eye on your kringle as it bakes! Ovens can vary, and you want that perfect golden-brown color. If it’s browning too quickly, don’t hesitate to cover the top loosely with aluminum foil to prevent it from burning while the inside continues to bake. You’ll want to check for that lovely flaky texture and a delicious aroma wafting through your kitchen!
Customize Your Icing
Feel free to get creative with the icing! While the basic vanilla icing is delightful, adding a splash of almond extract or even a hint of orange zest can take it to new heights. Play around with flavors to find your perfect combination!
With these tips in your back pocket, you’re all set to create a show-stopping Homemade Almond Kringle that’ll have everyone coming back for seconds. Happy baking, and enjoy every step of the process!
Variations
Getting creative with your Homemade Almond Kringle is one of the best parts of the baking experience! While the classic almond filling is absolutely divine, there are so many fun ways to mix it up and make this pastry your own. Let’s explore some delicious variations that are sure to impress!
Change Up the Filling
Why not experiment with different fillings? Here are a few ideas:
- Pistachio Paste: Swap the almond paste for pistachio paste for a nutty twist! The vibrant green color makes for a stunning presentation.
- Fruit Preserves: Spread a layer of your favorite fruit preserves, like raspberry or apricot, on top of the almond paste for a burst of fruity flavor that perfectly complements the sweetness.
- Cream Cheese Filling: For a richer filling, mix cream cheese with a bit of powdered sugar and vanilla. This creamy layer adds a delightful tang that balances the sweetness beautifully.
Add a Topping Twist
Once your kringle is baked, you can take it to the next level with some toppings:
- Chopped Nuts: Sprinkle some chopped almonds or hazelnuts on top of the icing for a delightful crunch and extra nutty flavor. It adds a lovely texture contrast!
- Chocolate Drizzle: Drizzle melted chocolate over the icing for a decadent touch. Who doesn’t love the combination of almond and chocolate?
- Coconut Flakes: For a tropical twist, sprinkle toasted coconut flakes on top of the icing. It not only looks gorgeous but also adds a lovely chewiness.
Flavor Infusions
Don’t hesitate to infuse your dough with different flavors! Here are a couple of ideas:
- Citrus Zest: Add some lemon or orange zest to the dough for a refreshing citrus kick that brightens up the flavors.
- Spices: A pinch of cinnamon or cardamom in the dough can introduce a warm, aromatic note that pairs beautifully with the almond filling.
With these variations, your Homemade Almond Kringle can be a new experience every time you bake it! Feel free to mix and match to find the combinations that speak to your taste buds. Happy baking, and enjoy the delicious adventure ahead!
Storage & Reheating Instructions
After all the hard work you put into creating your Homemade Almond Kringle, you’ll want to make sure it stays fresh and delicious for as long as possible! Storing it properly is key, and I’ve got some handy tips to help you out.
First things first, once your kringle has cooled completely, wrap it tightly in plastic wrap or aluminum foil. This helps prevent it from drying out and keeps that delightful flaky texture intact. If you’ve got any slices left over, you can store them in an airtight container at room temperature for up to three days. I love keeping it on the counter, ready for a quick snack or a sweet breakfast treat with my morning coffee!
If you want to keep your kringle for a longer period, freezing is a great option. Just wrap it well in plastic wrap and then in aluminum foil, or place it in a freezer-safe bag. It can be frozen for up to two months without losing its charm. When you’re ready to enjoy it again, simply move it to the fridge overnight to thaw, then let it sit at room temperature for about an hour before serving. This keeps it nice and soft!
Now for reheating! If you want to warm up your kringle and get that fresh-from-the-oven vibe, preheat your oven to 350°F (175°C). Place the kringle on a baking sheet and cover it loosely with aluminum foil to prevent it from browning too much. Heat it for about 10-15 minutes, and voilà! You’ll have a warm, flaky pastry that’s just as delightful as when you first baked it.
Alternatively, if you’re in a hurry, you can pop a slice in the microwave for about 15-20 seconds. Just keep an eye on it to make sure it doesn’t get too hot or tough. You want that perfect balance of warm and soft without losing any of that lovely texture!
With these storage and reheating tips, you’ll be able to savor every last bite of your Homemade Almond Kringle, no matter when you decide to enjoy it. Happy baking and snacking!
Nutritional Information
Let’s talk about the deliciousness you’re about to enjoy with your Homemade Almond Kringle! While indulging in this flaky, buttery pastry is a treat, it’s good to know what you’re biting into. Here’s an estimated breakdown of the nutritional values per slice:
- Calories: 250
- Fat: 15g
- Saturated Fat: 9g
- Unsaturated Fat: 4g
- Trans Fat: 0g
- Cholesterol: 30mg
- Sodium: 150mg
- Carbohydrates: 25g
- Fiber: 1g
- Sugar: 10g
- Protein: 3g
Keep in mind that these values are estimates and can vary based on the specific ingredients used and portion sizes. Enjoying a slice of this kringle is a delightful way to treat yourself, and knowing what’s in it can help you savor it even more! Happy baking and indulging!
FAQ Section
As you embark on your baking adventure with Homemade Almond Kringle, you might have a few questions. Don’t worry; I’ve got you covered! Here are some common inquiries and my answers to help guide you along the way.
Can I make the dough ahead of time?
Absolutely! You can prepare the dough and wrap it tightly in plastic wrap. Just store it in the fridge for up to 24 hours before rolling it out. If you want to make it even earlier, you can freeze it for up to two months. Just remember to thaw it in the fridge overnight before you roll it out!
What should I do if my almond paste is too dry?
If your almond paste feels a bit dry or crumbly, don’t panic! You can soften it by microwaving it for a few seconds or mixing in a teaspoon of water or almond extract. Just be careful not to add too much liquid; you want it soft but still spreadable!
Can I use different nuts instead of almond paste?
Of course! While almond paste is traditional, you can get creative. Try using pistachio paste or hazelnut spread for a fun twist. Just keep in mind that the flavor will change, but it’ll still be delicious!
How do I know when my kringle is done baking?
The best way to tell if your kringle is perfectly baked is by looking for that lovely golden-brown color. You can also gently press the top; it should spring back slightly. If you’re unsure, a toothpick inserted into the center should come out clean or with just a few moist crumbs.
Can I add fruit to the filling?
Yes, adding fruit preserves or fresh fruit can be a delightful addition! Just make sure to balance it with the almond paste, so the filling isn’t too runny. A layer of raspberry or apricot preserves can add a lovely tanginess that pairs beautifully with the sweet almond flavor!
What’s the best way to serve Homemade Almond Kringle?
This kringle is fabulous warm or at room temperature. I love serving it with a cup of coffee or tea for a cozy treat. You can also garnish it with some fresh fruit or whipped cream for an extra special touch, especially during gatherings or special occasions!
With these FAQs in mind, you’re well-equipped to tackle your Homemade Almond Kringle. Enjoy the process, and remember, baking is all about having fun and creating memories! Happy baking!
For more delicious recipes and inspiration, check out our website or follow us on Facebook and Pinterest!
Print
Homemade Almond Kringle: 7 Steps to Sweet Perfection
- Total Time: 1 hour
- Yield: 8 servings 1x
- Diet: Vegetarian
Description
Homemade Almond Kringle is a flaky, buttery, and sweet Danish pastry filled with almond paste and topped with icing.
Ingredients
- 2 cups all-purpose flour
- 1/2 cup unsalted butter, chilled
- 1/2 cup sour cream
- 1 cup almond paste
- 1/2 cup powdered sugar
- 1 teaspoon vanilla extract
- 1 egg, beaten (for egg wash)
Instructions
- Preheat your oven to 375°F (190°C).
- In a bowl, mix flour and butter until crumbly.
- Add sour cream and mix until dough forms.
- Chill the dough for 30 minutes.
- Roll out the dough into a rectangle on a floured surface.
- Spread almond paste evenly over the dough.
- Fold the dough into thirds and roll again into a rectangle.
- Shape the dough into a kringle and place on a baking sheet.
- Brush with beaten egg.
- Bake for 25-30 minutes or until golden brown.
- Mix powdered sugar and vanilla with water to create icing.
- Drizzle icing over the cooled kringle.
Notes
- Use chilled butter for a flaky texture.
- Store leftovers in an airtight container.
- For extra flavor, add almond extract to the icing.
- Prep Time: 30 minutes
- Cook Time: 30 minutes
- Category: Dessert
- Method: Baking
- Cuisine: Danish
Nutrition
- Serving Size: 1 slice
- Calories: 250
- Sugar: 10g
- Sodium: 150mg
- Fat: 15g
- Saturated Fat: 9g
- Unsaturated Fat: 4g
- Trans Fat: 0g
- Carbohydrates: 25g
- Fiber: 1g
- Protein: 3g
- Cholesterol: 30mg