

There’s something truly magical about the holiday season, and for me, that magic often comes in the form of holiday sugar cookies frosted with colorful delights! These little gems are the perfect way to spread joy, whether you’re baking for family gatherings, holiday parties, or simply to enjoy with a cup of cocoa while watching the snow fall outside. Soft and sweet, each bite of these cookies is a comforting hug, and the vibrant frosting adds an extra layer of cheer to your festive celebrations.
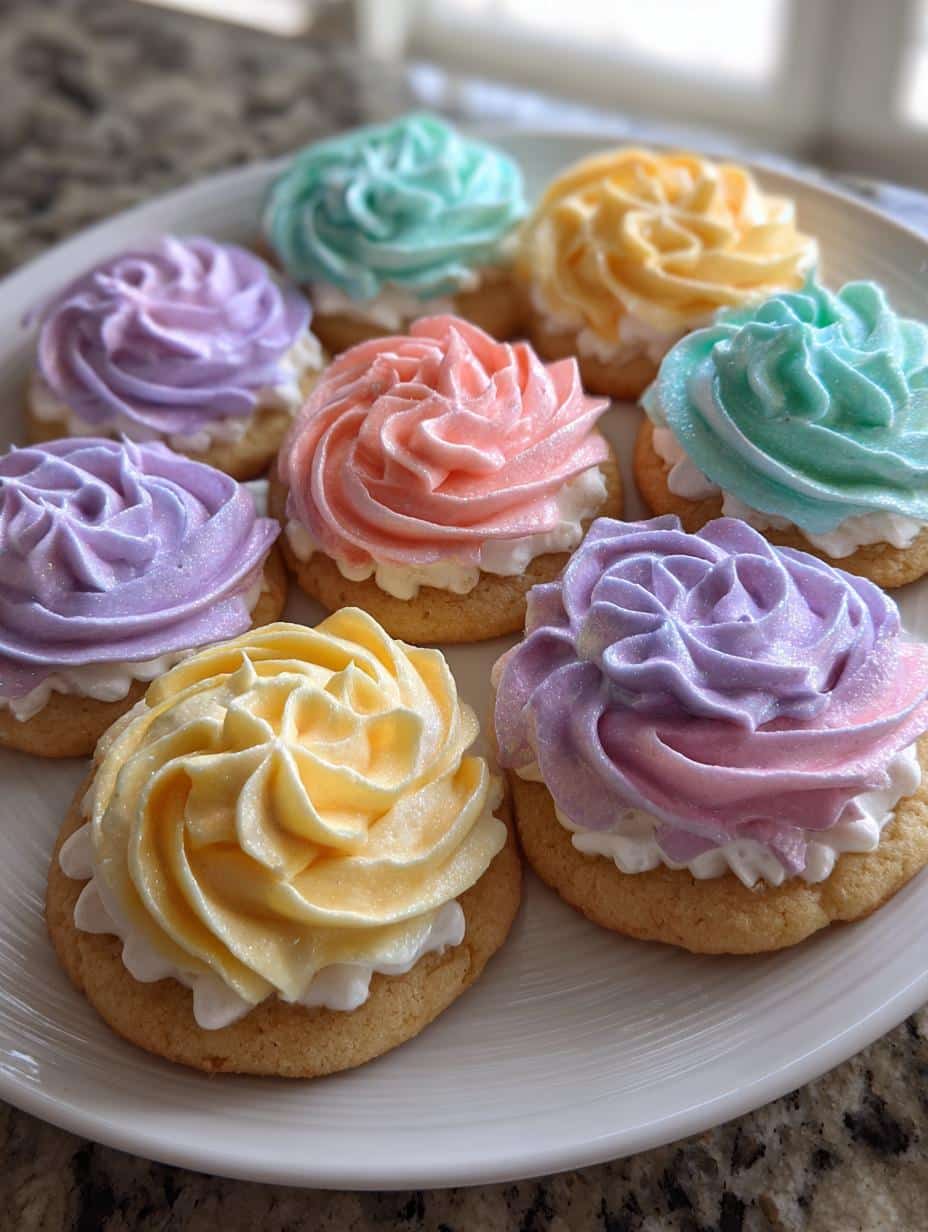
Picture this: your kitchen filled with the sweet aroma of freshly baked cookies, and then the fun begins as you decorate them with all sorts of colors and sprinkles! It’s a delightful activity that kids and adults alike will love. Plus, these holiday sugar cookies make for a wonderful treat to share with neighbors or to leave out for Santa. Trust me, once you whip up a batch, you’ll want to make them a holiday tradition!
Ingredients List
Here’s everything you’ll need to whip up these delightful holiday sugar cookies frosted! Make sure you gather all your ingredients before diving in. Each one plays a crucial role in creating that soft, sweet texture we all love.
- 2 3/4 cups all-purpose flour
- 1 teaspoon baking soda
- 1/2 teaspoon baking powder
- 1 cup unsalted butter, softened to room temperature
- 1 1/2 cups white sugar
- 1 egg
- 1 teaspoon vanilla extract
- 1/2 teaspoon almond extract
- 3 to 4 cups powdered sugar (for frosting)
- 2 tablespoons milk (for frosting)
- Food coloring (optional, for decorating)
These ingredients come together to create not just cookies, but a warm, festive experience! Get ready for some delicious fun!
How to Prepare Holiday Sugar Cookies Frosted
Let’s get started on creating these delightful holiday sugar cookies! Follow these simple steps, and you’ll have a batch of soft, sweet cookies ready to be frosted and shared in no time.
Preheat and Prepare Your Oven
First things first, preheat your oven to 375°F (190°C). Preheating is super important because it ensures even baking. No one wants cookies that are burnt on the outside and doughy on the inside! While the oven heats up, you can gather your other ingredients and get everything ready.
Mixing the Dry Ingredients
In a medium bowl, combine the 2 3/4 cups of all-purpose flour, 1 teaspoon of baking soda, and 1/2 teaspoon of baking powder. Give it a good whisk to ensure everything is evenly mixed. This step is crucial because it helps to create that fluffy texture we all love in cookies!
Creaming Butter and Sugar
Now, grab another bowl and cream together 1 cup of softened unsalted butter and 1 1/2 cups of white sugar. Use a hand mixer or stand mixer for this step! Mix until the mixture is smooth and fluffy—this usually takes about 2-3 minutes. You want it to look pale and airy, which means you’re on the right track!
Incorporating Wet Ingredients
Next, it’s time to beat in 1 egg, along with 1 teaspoon of vanilla extract and 1/2 teaspoon of almond extract. Mix until everything is well combined. The aroma of vanilla and almond wafting through your kitchen is just heavenly!
Combining Wet and Dry Ingredients
Now, gradually blend the dry ingredients into the wet mixture. I like to do this in thirds, mixing until just combined after each addition. This helps avoid overmixing, which can make your cookies tough. You want a nice, soft dough!
Shaping and Baking the Cookies
Once your dough is ready, roll rounded teaspoonfuls into balls and place them on ungreased cookie sheets. Make sure to leave some space between them; they tend to spread while baking. Pop them into the oven and bake for 8 to 10 minutes until they’re lightly golden around the edges!
Making the Frosting
While those cookies are baking, let’s whip up some frosting! In a bowl, mix together 3 to 4 cups of powdered sugar with 2 tablespoons of milk. If you want to add some flair, feel free to include food coloring! Mix until smooth and creamy, adjusting the consistency with more powdered sugar or milk as needed.
Frosting the Cookies
Once your cookies have cooled completely (very important to avoid a melty mess!), it’s time to spread the frosting on top. Use a knife or spatula to generously coat each cookie with that colorful frosting. Don’t be shy—this is where you can get creative with decorations!
Tips for Success
Ready to take your holiday sugar cookies frosted to the next level? Here are some pro tips that I swear by to ensure you get perfect results every time!
- Chill the Dough: If your dough feels too soft, pop it in the fridge for about 30 minutes. Chilling helps the cookies hold their shape while baking, preventing those sad, flat cookies!
- Use Parchment Paper: Line your cookie sheets with parchment paper for easy removal and cleanup. It also helps prevent the bottoms from getting too brown.
- Don’t Overbake: Keep a close eye on your cookies! They should be just set and lightly golden at the edges. They’ll continue to firm up as they cool.
- Get Creative with Frosting: Don’t be afraid to mix colors or add sprinkles for that festive flair! It’s all about making them as fun to look at as they are to eat.
- Storage Tip: Store your cookies in an airtight container with a slice of bread to keep them soft. Trust me, this little trick works wonders!
With these tips, you’re all set to bake up a storm! Enjoy the process and the delicious cookies that follow!
Nutritional Information Section
Let’s talk about what’s in these delightful holiday sugar cookies frosted! Now, keep in mind that these values are estimates based on a typical cookie. Each cookie packs a punch with approximately 150 calories. You’ll also find about 6 grams of fat, with 3 grams being saturated. The cookies have around 10 grams of sugar, making them satisfyingly sweet, and provide 1 gram of protein. With 22 grams of carbohydrates, they’re a delightful treat that fits right into your holiday festivities! Just remember, moderation is key to enjoying these festive goodies!
FAQ Section
Got questions about making holiday sugar cookies frosted? Don’t worry; I’ve got you covered! Here are some common queries and my answers to help you out.
Q1: Can I freeze these holiday sugar cookies?
Absolutely! These cookies freeze beautifully. Just make sure they are completely cooled before placing them in an airtight container or freezer bag. They can last up to three months in the freezer. Just thaw them at room temperature and frost when you’re ready to serve!
Q2: What if I don’t have almond extract?
No problem! You can simply replace it with more vanilla extract. The cookies will still taste delicious, just a bit different. You can also try using a few drops of other extracts like coconut or lemon for a fun twist!
Q3: How can I make the frosting stiffer?
If your frosting is too runny, simply add more powdered sugar, one tablespoon at a time, until you reach your desired consistency. You want it thick enough to hold its shape when you frost the cookies.
Q4: Can I use whole wheat flour instead of all-purpose flour?
You can, but keep in mind that the texture may change a bit. I recommend using a blend of whole wheat flour and all-purpose flour for a healthier option without sacrificing texture.
Q5: How do I make my cookies more festive?
Get creative! You can add colored sprinkles, edible glitter, or even drizzle different colored frostings on top. The possibilities are endless, and it’s all about having fun while decorating!
Why You’ll Love This Recipe
These holiday sugar cookies frosted are a true delight for so many reasons! Here’s why you’ll absolutely adore making them:
- Quick and Easy: With just a few simple steps, you can whip up a delicious batch in no time!
- Flavorful and Soft: The perfect balance of sweetness and that soft, melt-in-your-mouth texture makes every bite irresistible.
- Customizable: Whether you want to stick to classic colors or get creative with sprinkles, the decorating options are endless!
- Perfect for Sharing: These cookies are a festive favorite, making them a wonderful treat for family, friends, and neighbors.
- Holiday Tradition: Baking these cookies can become a cherished tradition, bringing joy and warmth to your celebrations!
Trust me, once you try them, you’ll want to make them every holiday season!
Storage & Reheating Instructions
To keep your holiday sugar cookies frosted fresh and delicious, store them in an airtight container at room temperature. They’ll stay soft for about a week, but I bet they won’t last that long! If you want to keep them even longer, you can freeze them. Just make sure they’re completely cooled before placing them in a freezer-safe bag or container. They can last up to three months in the freezer!
When you’re ready to enjoy them again, simply thaw the cookies at room temperature. If you like them warm, pop them in the microwave for about 10-15 seconds. Enjoy those soft, sweet treats all over again!
For more festive ideas, check out our Facebook page or follow us on Pinterest!
Print
Holiday Sugar Cookies Frosted: 7 Sweet Festive Joys
- Total Time: 30 minutes
- Yield: 24 cookies 1x
- Diet: Vegetarian
Description
These holiday sugar cookies are soft, sweet, and topped with colorful frosting.
Ingredients
- 2 3/4 cups all-purpose flour
- 1 teaspoon baking soda
- 1/2 teaspoon baking powder
- 1 cup unsalted butter, softened
- 1 1/2 cups white sugar
- 1 egg
- 1 teaspoon vanilla extract
- 1/2 teaspoon almond extract
- 3 to 4 cups powdered sugar
- 2 tablespoons milk
- Food coloring (optional)
Instructions
- Preheat your oven to 375°F (190°C).
- In a bowl, mix flour, baking soda, and baking powder.
- In a separate bowl, cream together butter and sugar until smooth.
- Beat in the egg, vanilla, and almond extracts.
- Gradually blend in the dry ingredients.
- Roll rounded teaspoonfuls of dough into balls and place on ungreased cookie sheets.
- Bake for 8 to 10 minutes, until golden.
- Let cool before frosting.
- To make frosting, mix powdered sugar, milk, and food coloring until smooth.
- Spread frosting on cooled cookies.
Notes
- Store cookies in an airtight container.
- Use any food coloring for desired decoration.
- These cookies can be shaped with cookie cutters.
- Prep Time: 20 minutes
- Cook Time: 10 minutes
- Category: Dessert
- Method: Baking
- Cuisine: American
Nutrition
- Serving Size: 1 cookie
- Calories: 150
- Sugar: 10g
- Sodium: 50mg
- Fat: 6g
- Saturated Fat: 3g
- Unsaturated Fat: 2g
- Trans Fat: 0g
- Carbohydrates: 22g
- Fiber: 0g
- Protein: 1g
- Cholesterol: 15mg