
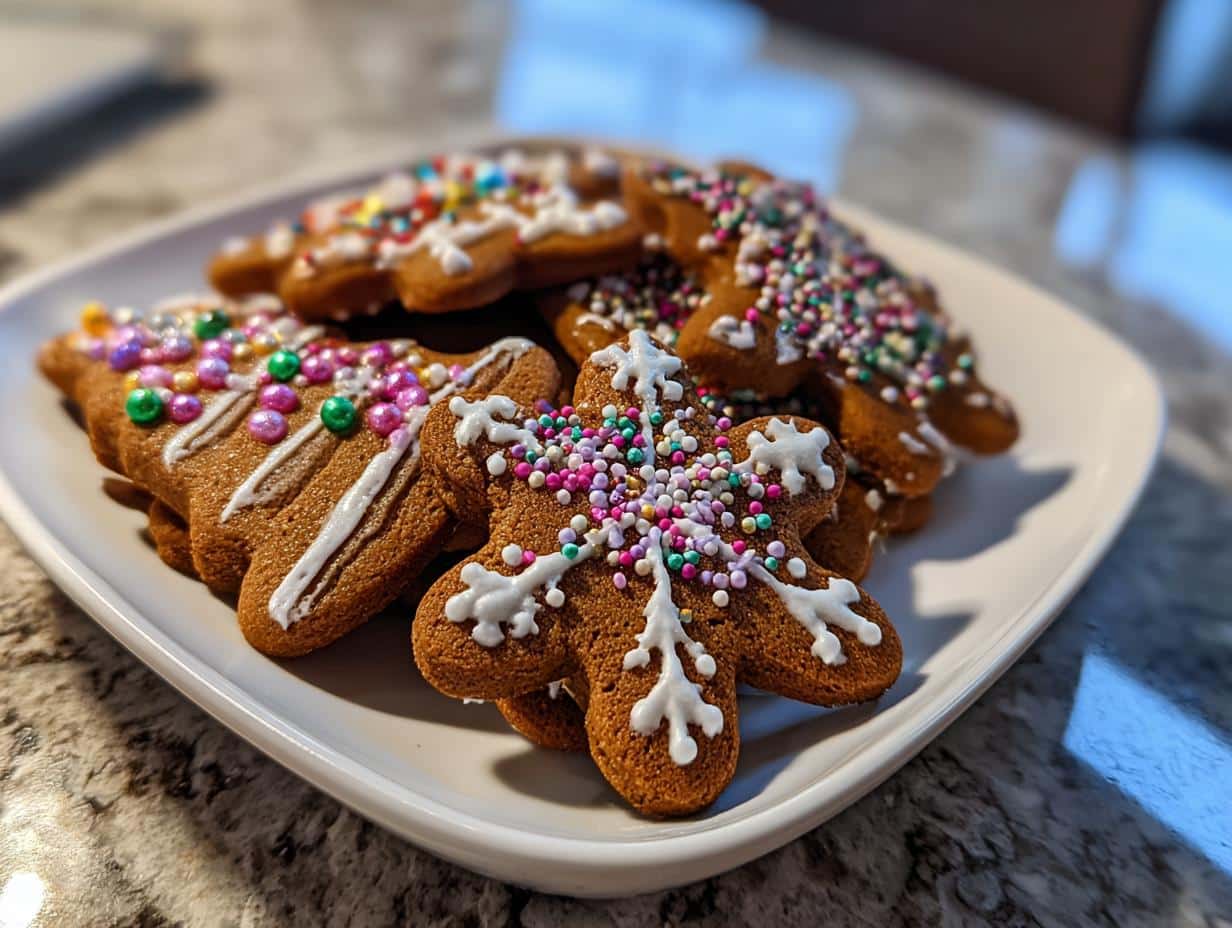
There’s something truly magical about the holiday season, isn’t there? The air is filled with warmth and cheer, and my kitchen smells like a cozy dream of spices and sweetness. One of my absolute favorite traditions is baking gingerbread cookies decorated to spread that festive joy! These cookies aren’t just any treat; they bring a touch of whimsy and nostalgia to every gathering. I can still hear my kids giggling as they sprinkle colored decorations over the icing, their little fingers turning into a delightful mess of creativity!
Every year, my family gathers around the table, rolling out dough and cutting out shapes, while we reminisce about our past holiday adventures. The laughter, the flour flying everywhere, and the sweet anticipation of tasting our creations make it all special. Trust me, once you start this tradition, you’ll find yourself looking forward to it just as much as I do. So let’s dive into this festive recipe and make some gingerbread magic together!
Ingredients List
- 2 1/4 cups all-purpose flour
- 1/2 teaspoon baking soda
- 1 tablespoon ground ginger
- 1 tablespoon ground cinnamon
- 1/2 teaspoon ground cloves
- 1/4 teaspoon salt
- 3/4 cup unsalted butter, softened to room temperature
- 3/4 cup packed brown sugar
- 1 large egg
- 1/2 cup molasses
- 1 teaspoon vanilla extract
- Royal icing for decoration (homemade or store-bought)
- Colored sprinkles for that festive flair
How to Prepare Gingerbread Cookies Decorated
Step 1: Prepare the Oven and Dry Ingredients
First things first, let’s get that oven preheating to 350°F (175°C)! While it’s warming up, grab a mixing bowl and combine the dry ingredients. You’ll want to whisk together 2 1/4 cups of all-purpose flour, 1/2 teaspoon of baking soda, 1 tablespoon of ground ginger, 1 tablespoon of ground cinnamon, 1/2 teaspoon of ground cloves, and 1/4 teaspoon of salt. Mixing these spices together before adding them to the wet ingredients helps distribute their flavors evenly throughout the dough. Trust me, you don’t want any clumps of spice lurking in your cookies!
Step 2: Create the Dough
Now it’s time to cream together 3/4 cup of softened unsalted butter and 3/4 cup of packed brown sugar in a separate bowl until it’s smooth and fluffy. This step is key for getting that delightful texture in your cookies! Once they’re combined, add in 1 large egg, 1/2 cup of molasses, and 1 teaspoon of vanilla extract. Mix it all together until it’s fully incorporated. You’ll see that rich, dark color coming through. Now, gradually add the dry mixture to your wet ingredients, stirring gently until everything is just combined. Remember, overmixing can lead to tough cookies, so stop when you don’t see any more flour!
Step 3: Chill the Dough
Here’s a crucial step that you can’t skip: chill the dough! Wrap it in plastic wrap and pop it in the fridge for about an hour. This helps the flavors develop and makes the dough easier to roll out. Plus, it keeps your cookies from spreading too much while baking. So, go ahead and tidy up a bit or enjoy a cup of hot cocoa while you wait!
Step 4: Shape and Bake
Once your dough is nice and chilled, it’s time to roll it out! Lightly flour your work surface and roll the dough to about 1/4 inch thick. Use your favorite cookie cutters to cut out festive shapes—think stars, gingerbread men, or holiday trees! Place the cutouts on a baking sheet lined with parchment paper. Bake them in the preheated oven for about 8-10 minutes. You’ll know they’re ready when the edges look firm but the centers are still slightly soft. Don’t worry, they’ll firm up as they cool!
Step 5: Cool and Decorate
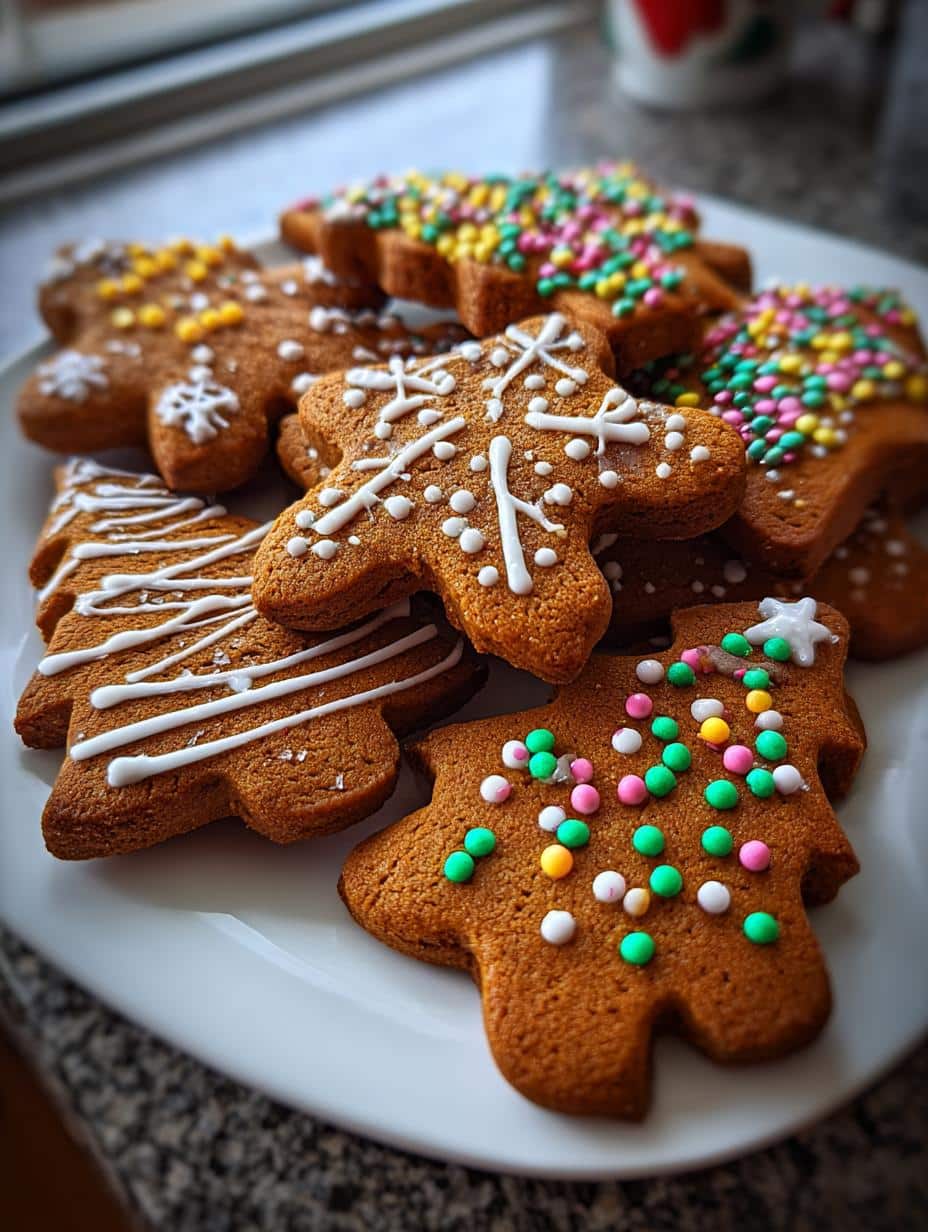
Once baked, let those cookies cool completely on a wire rack. Patience is key here! While they’re cooling, whip up some royal icing (or use store-bought, no shame in that!). Once the cookies are cool, it’s time to unleash your inner artist! Use the royal icing to create fun designs, and don’t forget to sprinkle on those colorful decorations. Let the icing dry completely before stacking your cookies to avoid any sticky situations. And there you have it—gorgeous, delicious gingerbread cookies decorated to perfection!
Tips for Success
Getting those gingerbread cookies just right can feel like a challenge, but I’ve got some handy tips to help you nail it every time!
Handle the Dough with Care
When rolling out your dough, make sure your surface is lightly floured to prevent sticking. If the dough gets too warm while you’re working with it, just pop it back in the fridge for a few minutes. This will keep it manageable and help maintain those lovely shapes when you cut them out!
Perfecting Your Icing Technique
For the royal icing, it’s all about consistency. You want it to be thick enough to hold its shape, but thin enough to spread easily for those intricate designs. A good test is to lift a spoonful; it should hold its shape for a few seconds before blending back into the bowl. If it’s too thick, just add a tiny bit of water at a time until you reach that sweet spot!
Storing Your Cookies
Once you’ve decorated your cookies, let them sit out until the icing is completely dry. This usually takes a few hours, but it’s worth the wait! To store your cookies, place them in an airtight container with parchment paper between layers to keep them from sticking together. They’ll stay fresh for about a week, but trust me, they won’t last that long!
Experiment with Shapes and Flavors
Don’t be afraid to get creative! Use different cookie cutters for unique shapes, or even add spices like nutmeg or cardamom to the dough for a fun twist. You can also try flavored icing by adding a few drops of almond or peppermint extract. The possibilities are endless!
By following these tips, you’ll be well on your way to making gingerbread cookies decorated that not only look fantastic but taste amazing too. Happy baking!
Variations
Now that you’ve mastered the classic gingerbread cookies decorated, why not mix it up a bit? There are so many fun variations you can try to make these festive treats unique and exciting!
Flavors Galore
While the traditional blend of spices is always a hit, you can add a twist by experimenting with different flavors. Try incorporating:
- Nutmeg and Allspice: Add a pinch of these spices for a warm, holiday aroma.
- Citrus Zest: Grate some orange or lemon zest into the dough for a refreshing twist.
- Chocolate: Toss in some cocoa powder for a chocolatey variation or dip half the cookies in melted chocolate.
- Maple Syrup: Substitute some of the molasses with maple syrup for a rich, sweet flavor.
Creative Shapes
Don’t feel limited to gingerbread men and houses! Use cookie cutters in various shapes to celebrate the season:
- Holiday Symbols: Think snowflakes, stars, or candy canes to add festive cheer.
- Animals: Create fun animal shapes like reindeer or penguins for a whimsical touch.
- Personalized Cookies: Use alphabet cutters to spell out names or festive greetings for a personal touch!
Decorative Ideas
When it comes to decorating, the sky’s the limit! Here are some fun ideas:
- Royal Icing Colors: Divide your royal icing into different bowls and tint them with food coloring for a vibrant display.
- Edible Glitter: Sprinkle a little edible glitter on top for a magical touch that catches the light!
- Creative Sprinkles: Use themed sprinkles like stars, snowflakes, or holiday colors to make your cookies pop.
- Fondant Decorations: Roll out some fondant to create shapes like bows or holly leaves for a polished look.
These variations will not only keep things interesting but also allow you to tailor your gingerbread cookies decorated to suit any taste or occasion. Get creative and have fun with it—your cookie creations will be a hit no matter what!
Nutritional Information
When it comes to enjoying gingerbread cookies decorated, it’s always nice to know what you’re indulging in! Here are the typical nutritional values for one cookie, based on the ingredients used in this recipe:
- Calories: 150
- Fat: 6g
- Saturated Fat: 3g
- Unsaturated Fat: 2g
- Trans Fat: 0g
- Cholesterol: 15mg
- Sodium: 50mg
- Carbohydrates: 22g
- Fiber: 1g
- Sugar: 10g
- Protein: 2g
These values are estimates and can vary based on specific ingredients and portion sizes, but they give you a good idea of what to expect. Enjoy these festive treats in moderation, and savor every delicious bite!
FAQ Section
What makes gingerbread cookies decorated different from regular gingerbread cookies?
Gingerbread cookies decorated are all about the fun and creativity that comes with adding your own personal touch! While regular gingerbread cookies focus on that delicious spicy flavor, the decorated version allows you to unleash your artistic side. With royal icing and colorful sprinkles, you can transform simple cookies into festive masterpieces that are perfect for sharing during the holidays!
Can I store gingerbread cookies decorated, and how long do they last?
Absolutely! Once your gingerbread cookies decorated are completely cool and the icing has dried, store them in an airtight container. They can last up to a week at room temperature. To keep them fresh and avoid sticking, it’s a good idea to layer them with parchment paper. If you want to keep them longer, you can freeze them before decorating, and they’ll be just as tasty when you thaw and frost them later!
What type of icing should I use for decorating gingerbread cookies?
Royal icing is the go-to choice for decorating gingerbread cookies because it dries hard, making it perfect for creating intricate designs and stacking cookies without them getting ruined. You can make your own royal icing using powdered sugar, egg whites, and a splash of lemon juice, or you can buy it pre-made. Either way, it’s super fun to work with and creates that classic cookie look!
Can I make the dough ahead of time?
You bet! The dough for gingerbread cookies decorated can be made ahead of time. Just wrap it tightly in plastic wrap and store it in the refrigerator for up to a week. You can also freeze it for up to three months. When you’re ready to bake, let it thaw in the fridge overnight, and then proceed with rolling and cutting your festive shapes!
Are there any allergy-friendly alternatives for this recipe?
Yes! If you need to make allergy-friendly gingerbread cookies decorated, there are several substitutions you can try. Use gluten-free flour blend in place of all-purpose flour for a gluten-free version. For dairy-free options, swap the butter with coconut oil or a vegan butter substitute. You can also experiment with flax eggs for an egg-free option. Just keep in mind that these changes may slightly alter the texture and flavor, but they can still be delicious!
Why You’ll Love This Recipe
- Quick and Easy: This recipe comes together in no time, perfect for busy holiday schedules!
- Festive Fun: Decorating gingerbread cookies is a cherished family activity that brings everyone together to share creativity and laughter.
- Deliciously Spiced: The warm blend of ginger, cinnamon, and cloves creates a cozy flavor that’s simply irresistible.
- Customizable: You can shape and decorate the cookies however you like, making each batch uniquely yours!
- Perfect for Gifting: These cookies make wonderful gifts for friends and family, spreading holiday cheer with every bite.
- Tradition in the Making: This recipe is a fantastic way to start a new holiday tradition that your kids will cherish for years to come.
For more festive ideas, check out our Pinterest page for inspiration!
Print
Gingerbread Cookies Decorated: 7 Magical Holiday Moments
- Total Time: 1 hour 40 minutes
- Yield: 24 cookies 1x
- Diet: Vegetarian
Description
Gingerbread cookies decorated for the holidays.
Ingredients
- 2 1/4 cups all-purpose flour
- 1/2 teaspoon baking soda
- 1 tablespoon ground ginger
- 1 tablespoon ground cinnamon
- 1/2 teaspoon ground cloves
- 1/4 teaspoon salt
- 3/4 cup unsalted butter, softened
- 3/4 cup brown sugar
- 1 large egg
- 1/2 cup molasses
- 1 teaspoon vanilla extract
- Royal icing for decoration
- Colored sprinkles
Instructions
- Preheat the oven to 350°F (175°C).
- In a bowl, mix flour, baking soda, ginger, cinnamon, cloves, and salt.
- In another bowl, beat butter and brown sugar until smooth.
- Add egg, molasses, and vanilla to the butter mixture and mix well.
- Gradually add the dry ingredients to the wet mixture.
- Refrigerate dough for 1 hour.
- Roll out dough to 1/4 inch thick and cut into shapes.
- Bake for 8-10 minutes or until edges are firm.
- Let cookies cool completely before decorating.
- Use royal icing and sprinkles to decorate as desired.
Notes
- Store cookies in an airtight container.
- Use different cookie cutters for various shapes.
- Let the icing dry completely before stacking cookies.
- Prep Time: 30 minutes
- Cook Time: 10 minutes
- Category: Dessert
- Method: Baking
- Cuisine: American
Nutrition
- Serving Size: 1 cookie
- Calories: 150
- Sugar: 10g
- Sodium: 50mg
- Fat: 6g
- Saturated Fat: 3g
- Unsaturated Fat: 2g
- Trans Fat: 0g
- Carbohydrates: 22g
- Fiber: 1g
- Protein: 2g
- Cholesterol: 15mg